Mass Import Clients
MASS IMPORT CLIENTS, available in the “Area Tools” menu of Client & Record Management, lets full administrators bulk-create or update client accounts from a CSV file. It’s a self-service tool you can run as often as you like — useful for bringing over a roster from another system, pre-registering students before a term begins, or keeping existing profile data such as class year or major up to date.
Before You Import
Section titled “Before You Import”We recommend backing up your existing registration data first using the System Data Export tool. The export also serves as a template for the automated field mapping described below, since the column headers match the field IDs the import tool expects.
Preparing Your CSV File
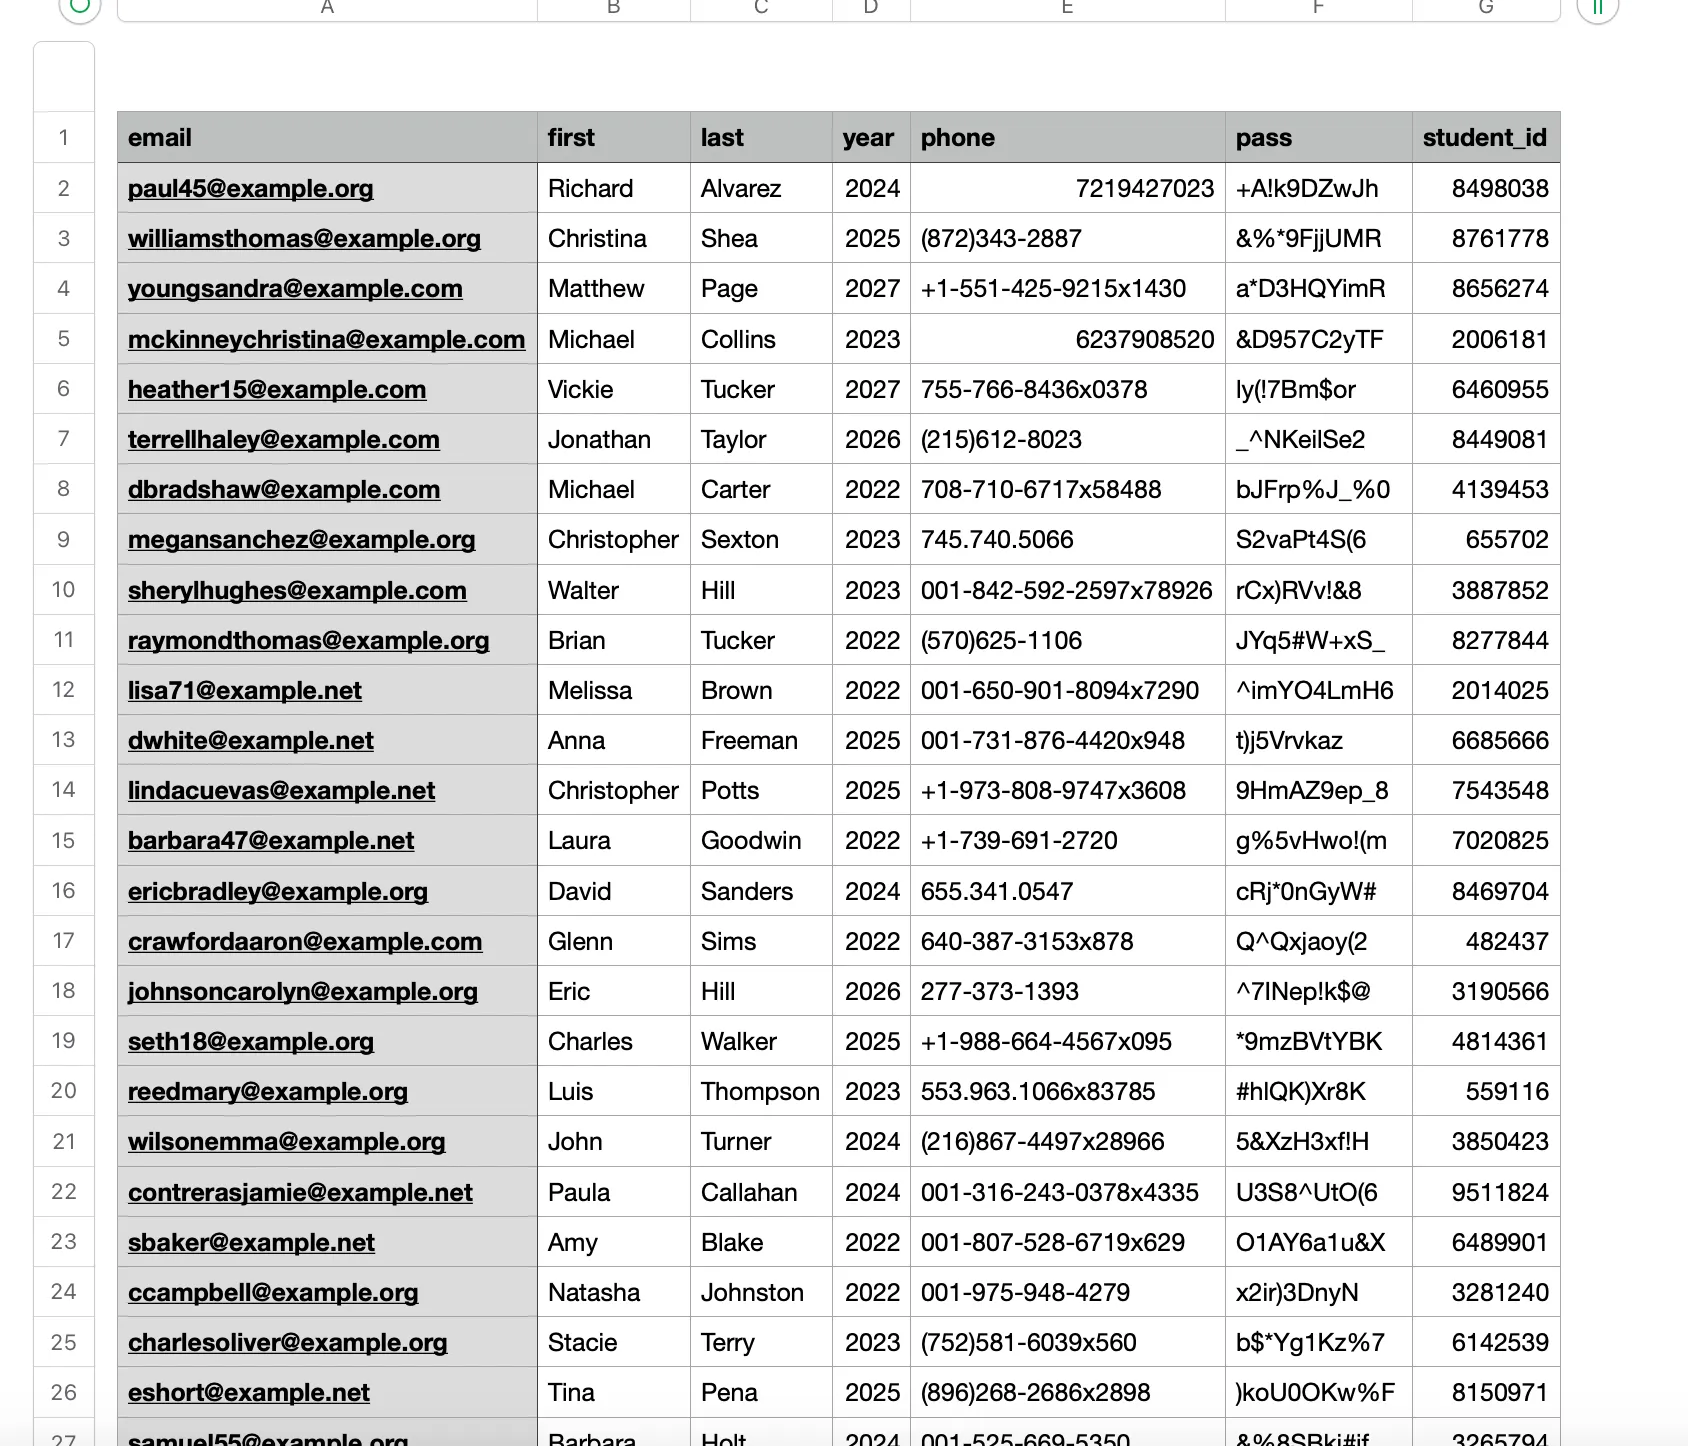
Section titled “Preparing Your CSV File”WCONLINE only requires three columns for each row, so make sure your file includes a header for each:
- First Name
- Last Name
Any other fields — major, student ID, graduate year, and so on — are optional. You can import as many as you like, as long as each has a column header that matches a field or question on your Registration Form. The import maps columns to registration fields by name, so matching headers let the system place each value automatically.
Opening the Tool
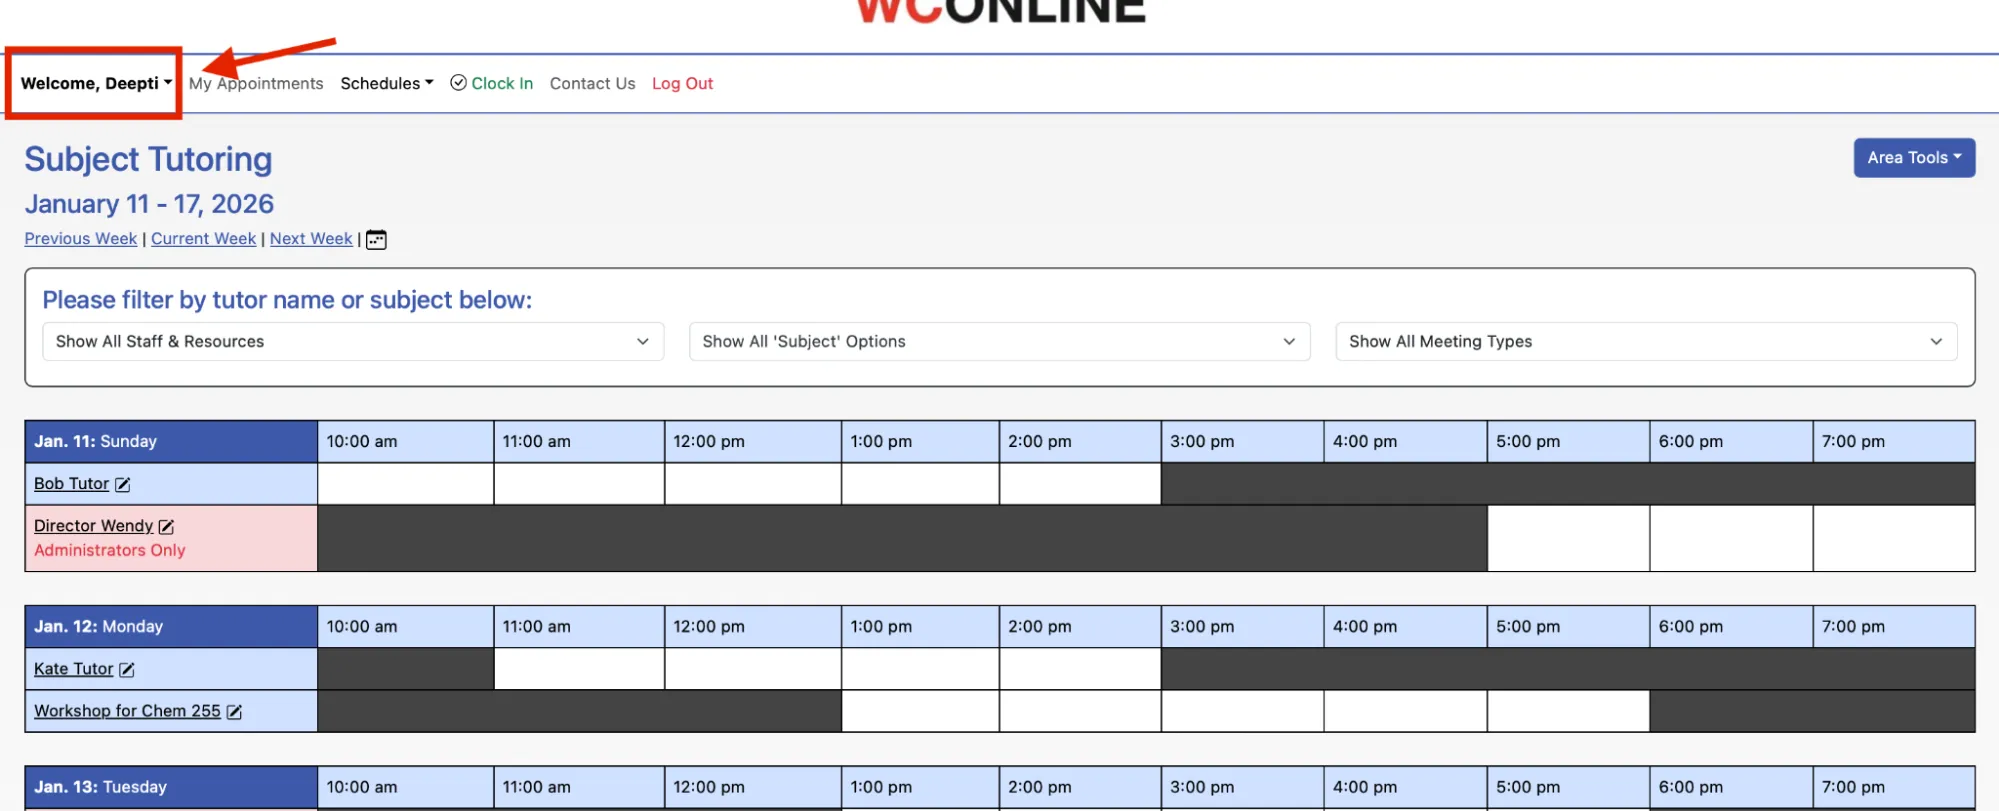
Section titled “Opening the Tool”To reach the tool, open the Welcome menu in WCONLINE.
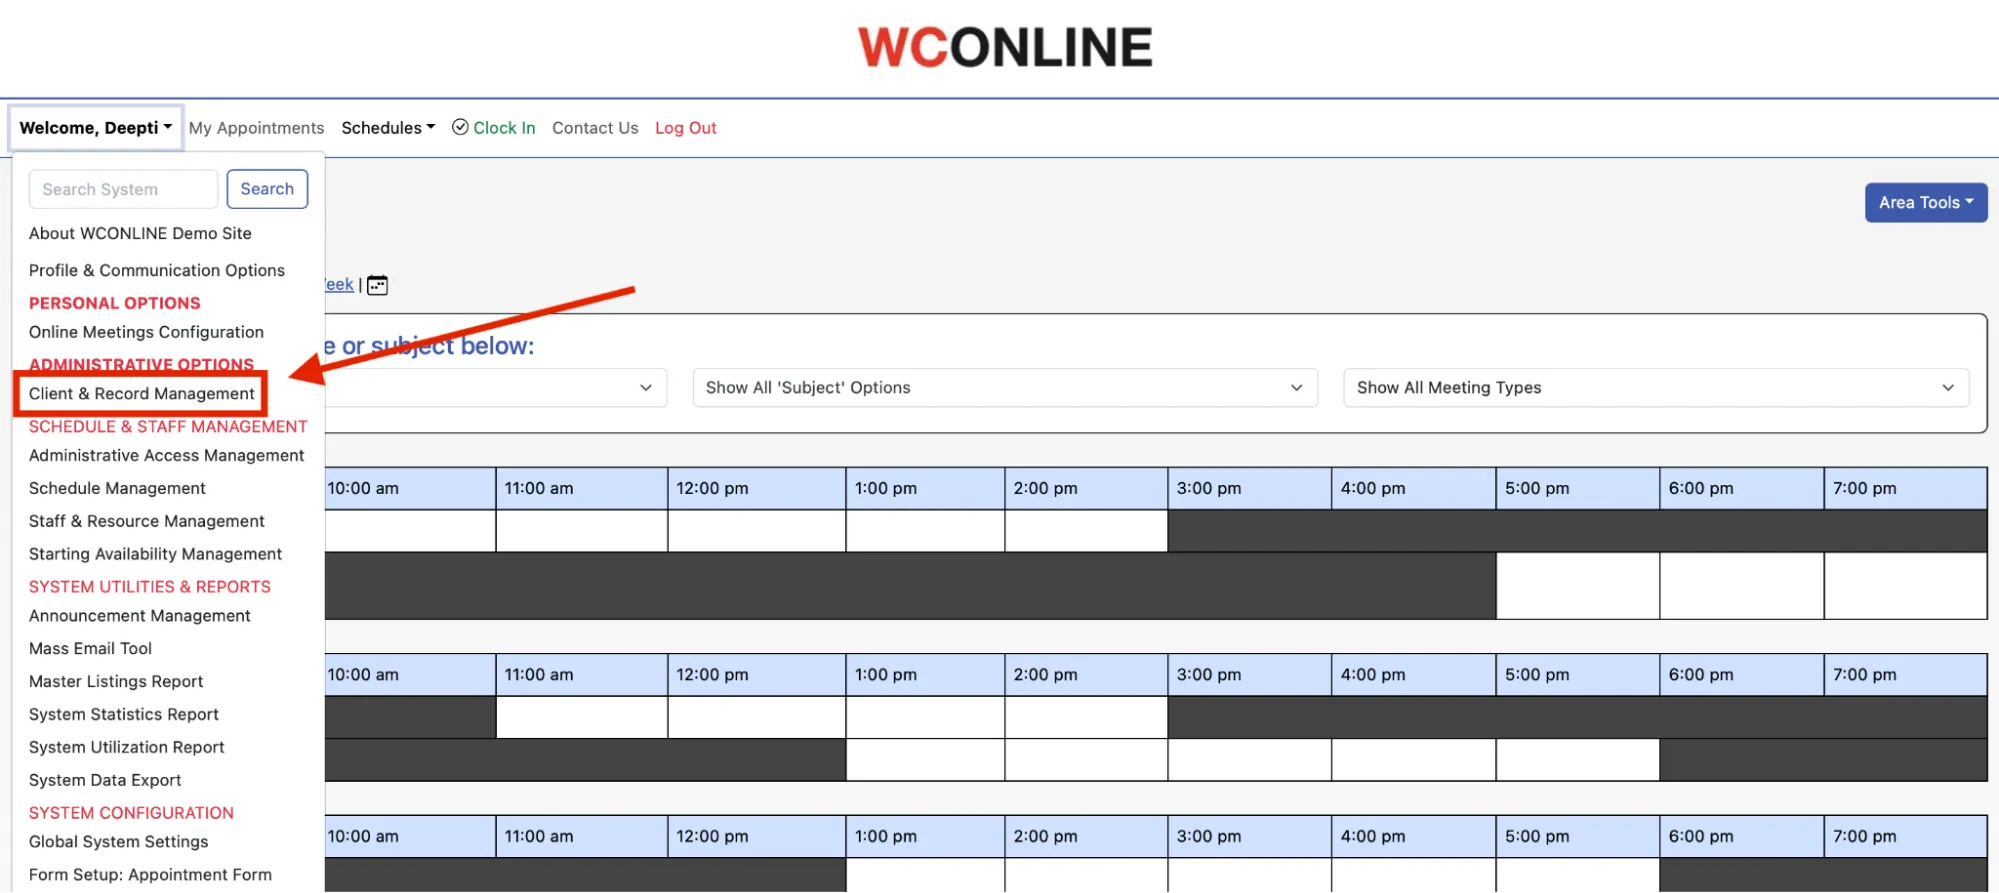
From the Welcome menu, select Client & Record Management.
Within Client & Record Management, open Area Tools and choose Mass Import Clients.

Uploading Your File
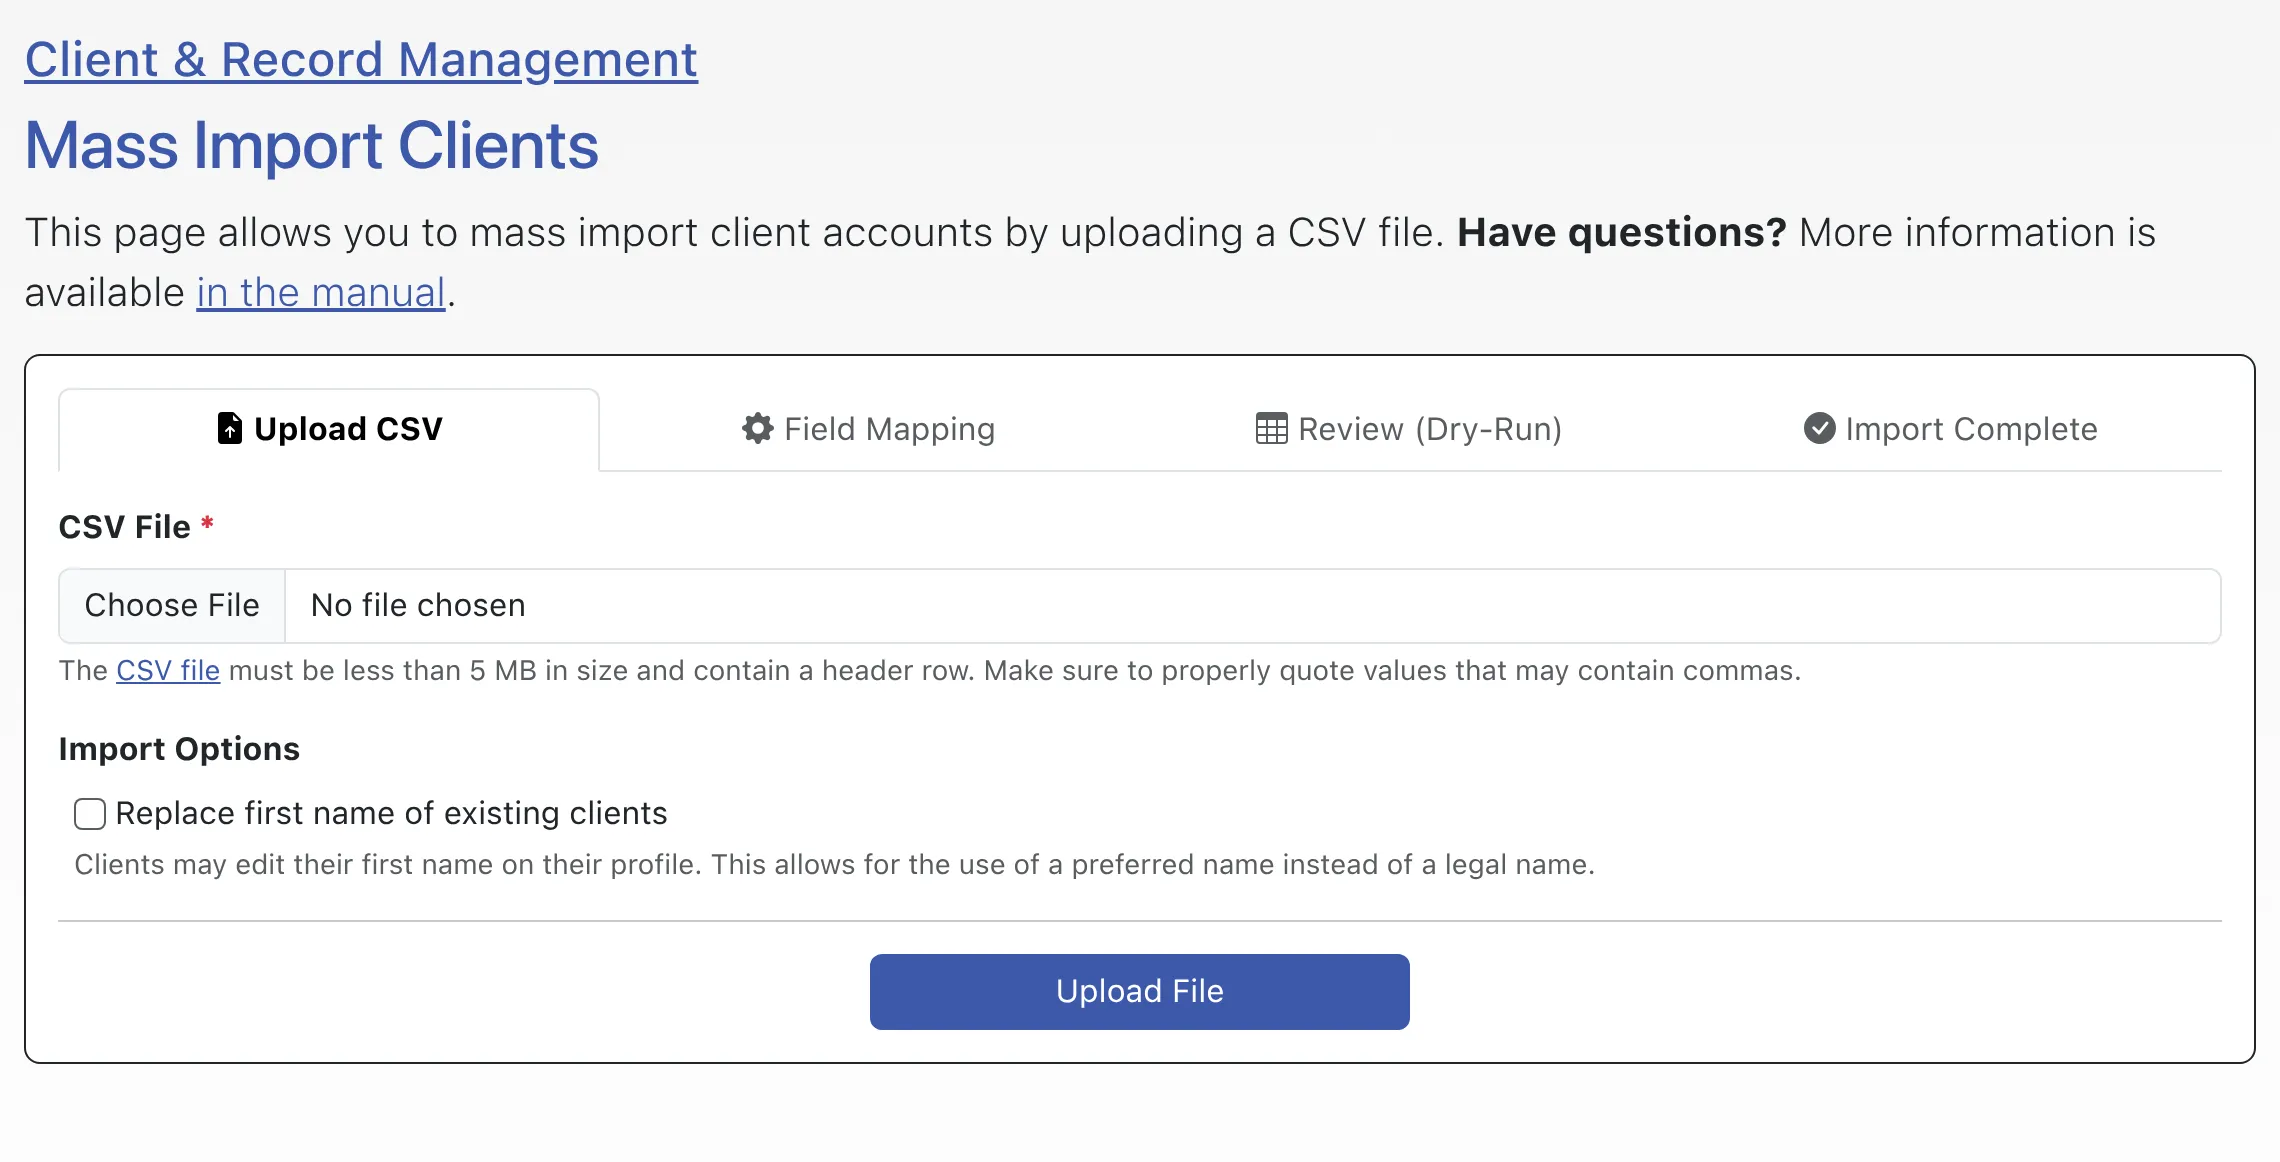
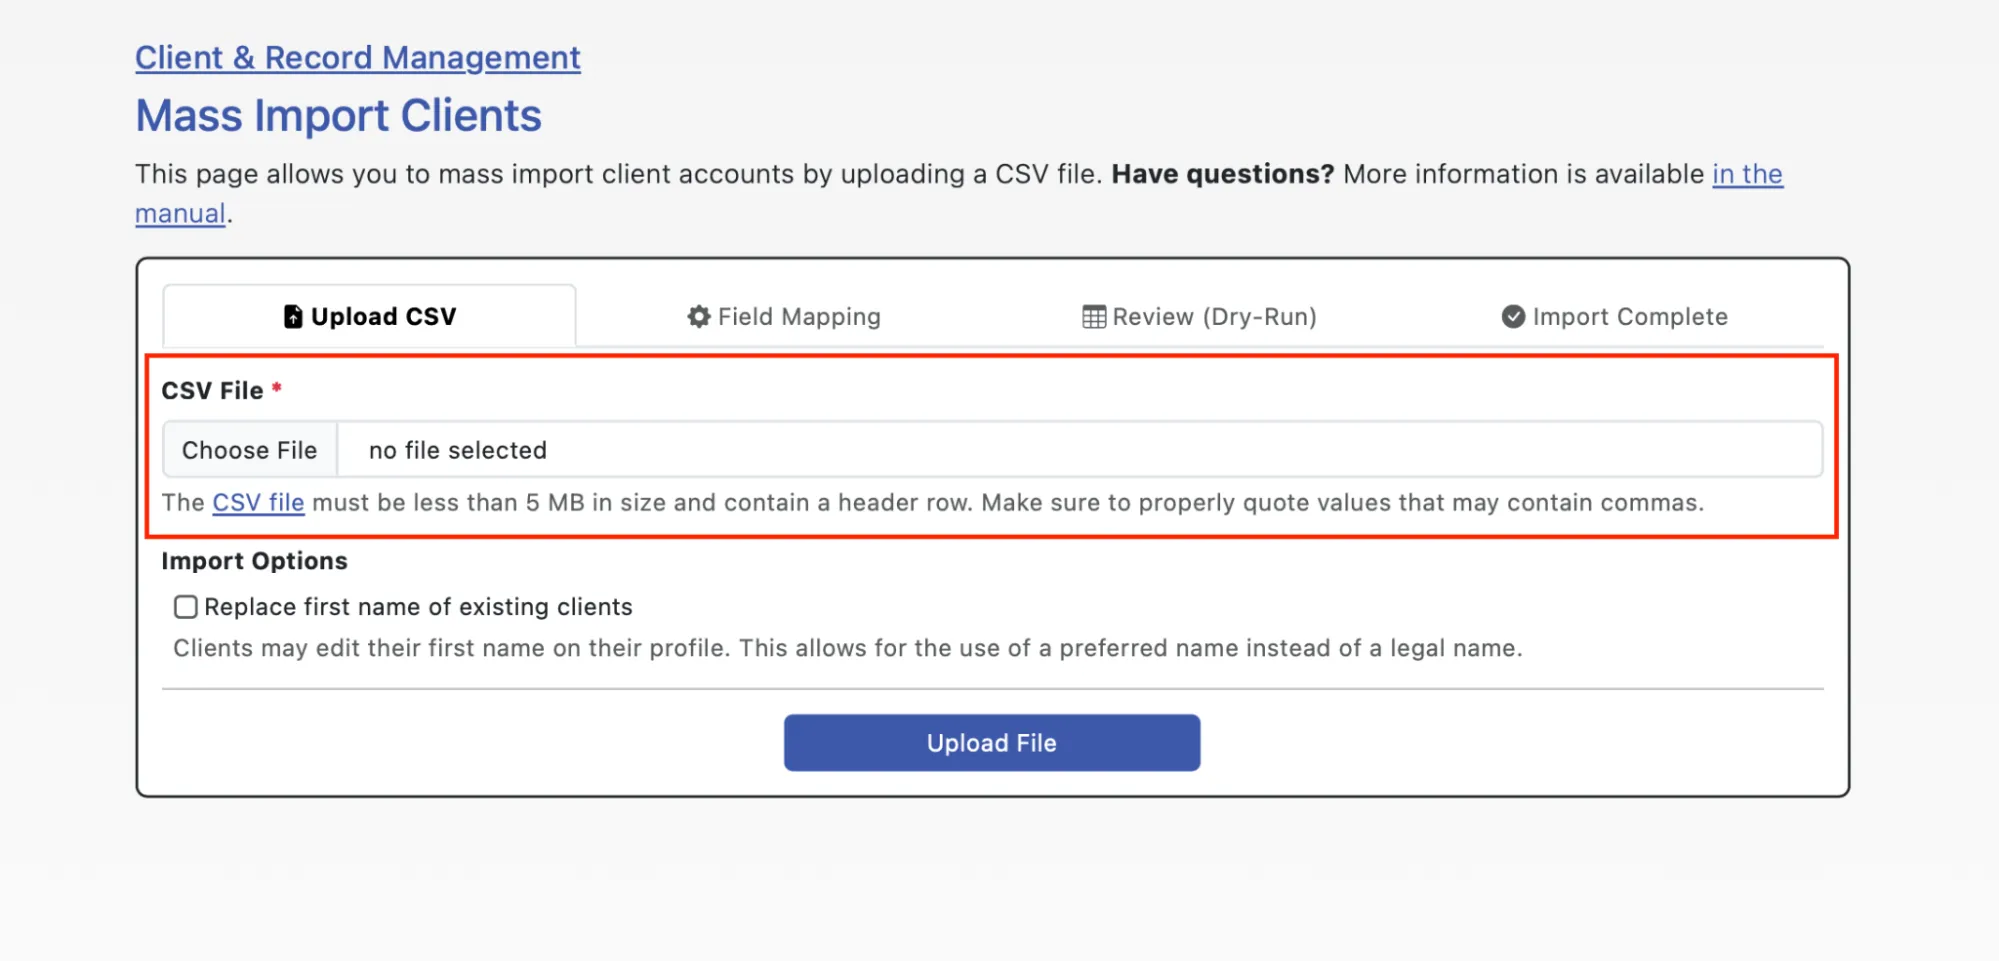
Section titled “Uploading Your File”On the Mass Import Clients page, upload the CSV containing the client profile information. The file must be no larger than 5 MB.
Field Mapping
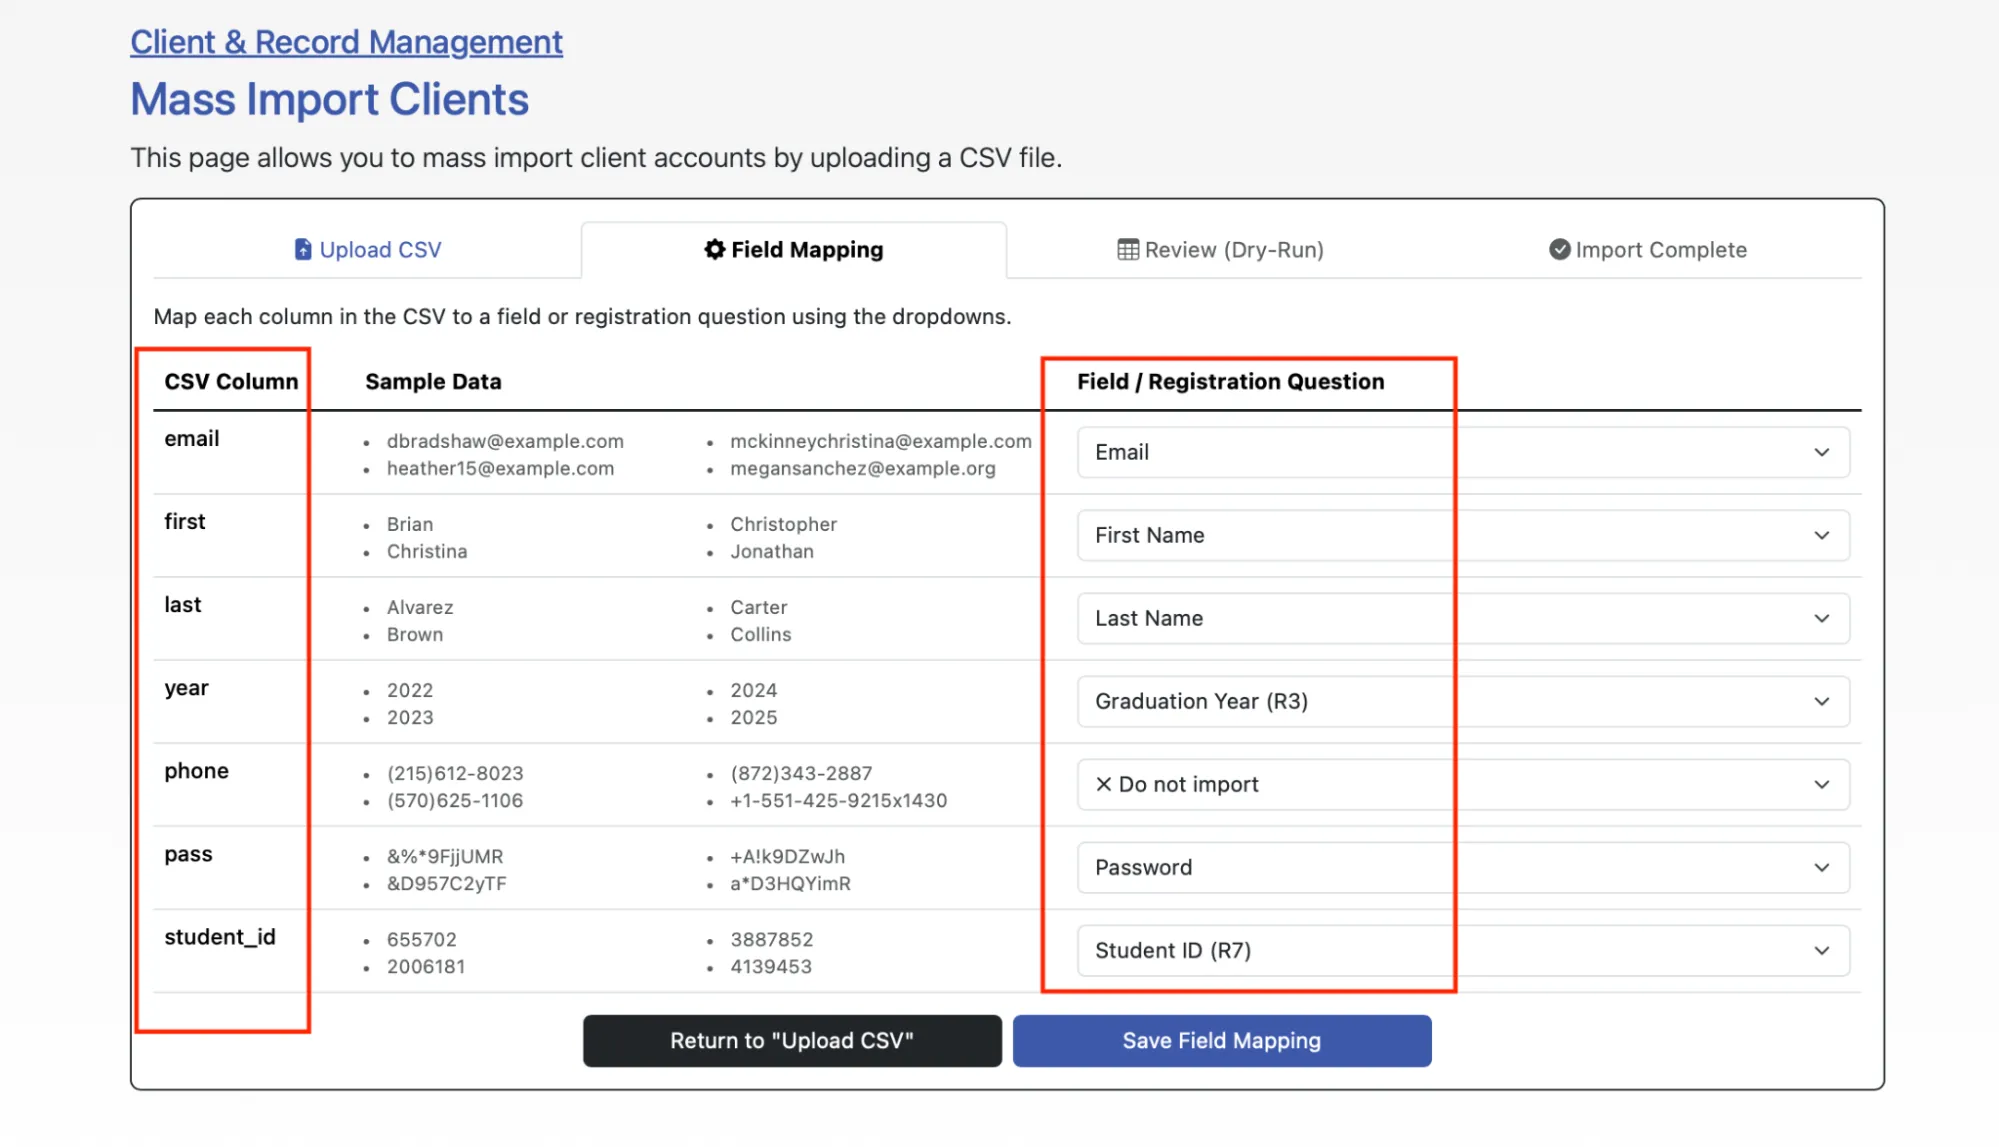
Section titled “Field Mapping”After you select Upload File, the tool moves to the field-mapping step and automatically maps your CSV column headers to the matching registration fields. Check each column header — and the value shown under Sample Data — against the registration field it’s mapped to. For example, if you’re importing student ID numbers, confirm those numbers are being directed to your student ID question. Use the drop-down menus under Field / Registration Question to override or manually map anything the system didn’t get right.
Passwords for New Accounts
Section titled “Passwords for New Accounts”If you’re importing passwords, do not add a password field to your registration form — for security reasons, the system supplies a dedicated password option in the mapping drop-downs so the value is imported securely. The import also accepts a shorter minimum password length than the standard Profile & Communication Options registration form, because imported passwords are usually placeholders the client replaces on first login rather than being subject to the full complexity rules.
You don’t have to assign a password to every client:
- If you use SAML Single Sign-On (which we recommend), clients don’t need an imported password at all.
- Otherwise, any client without an imported password uses the reset password workflow on the login page the first time they sign in.
Reviewing the Dry-Run
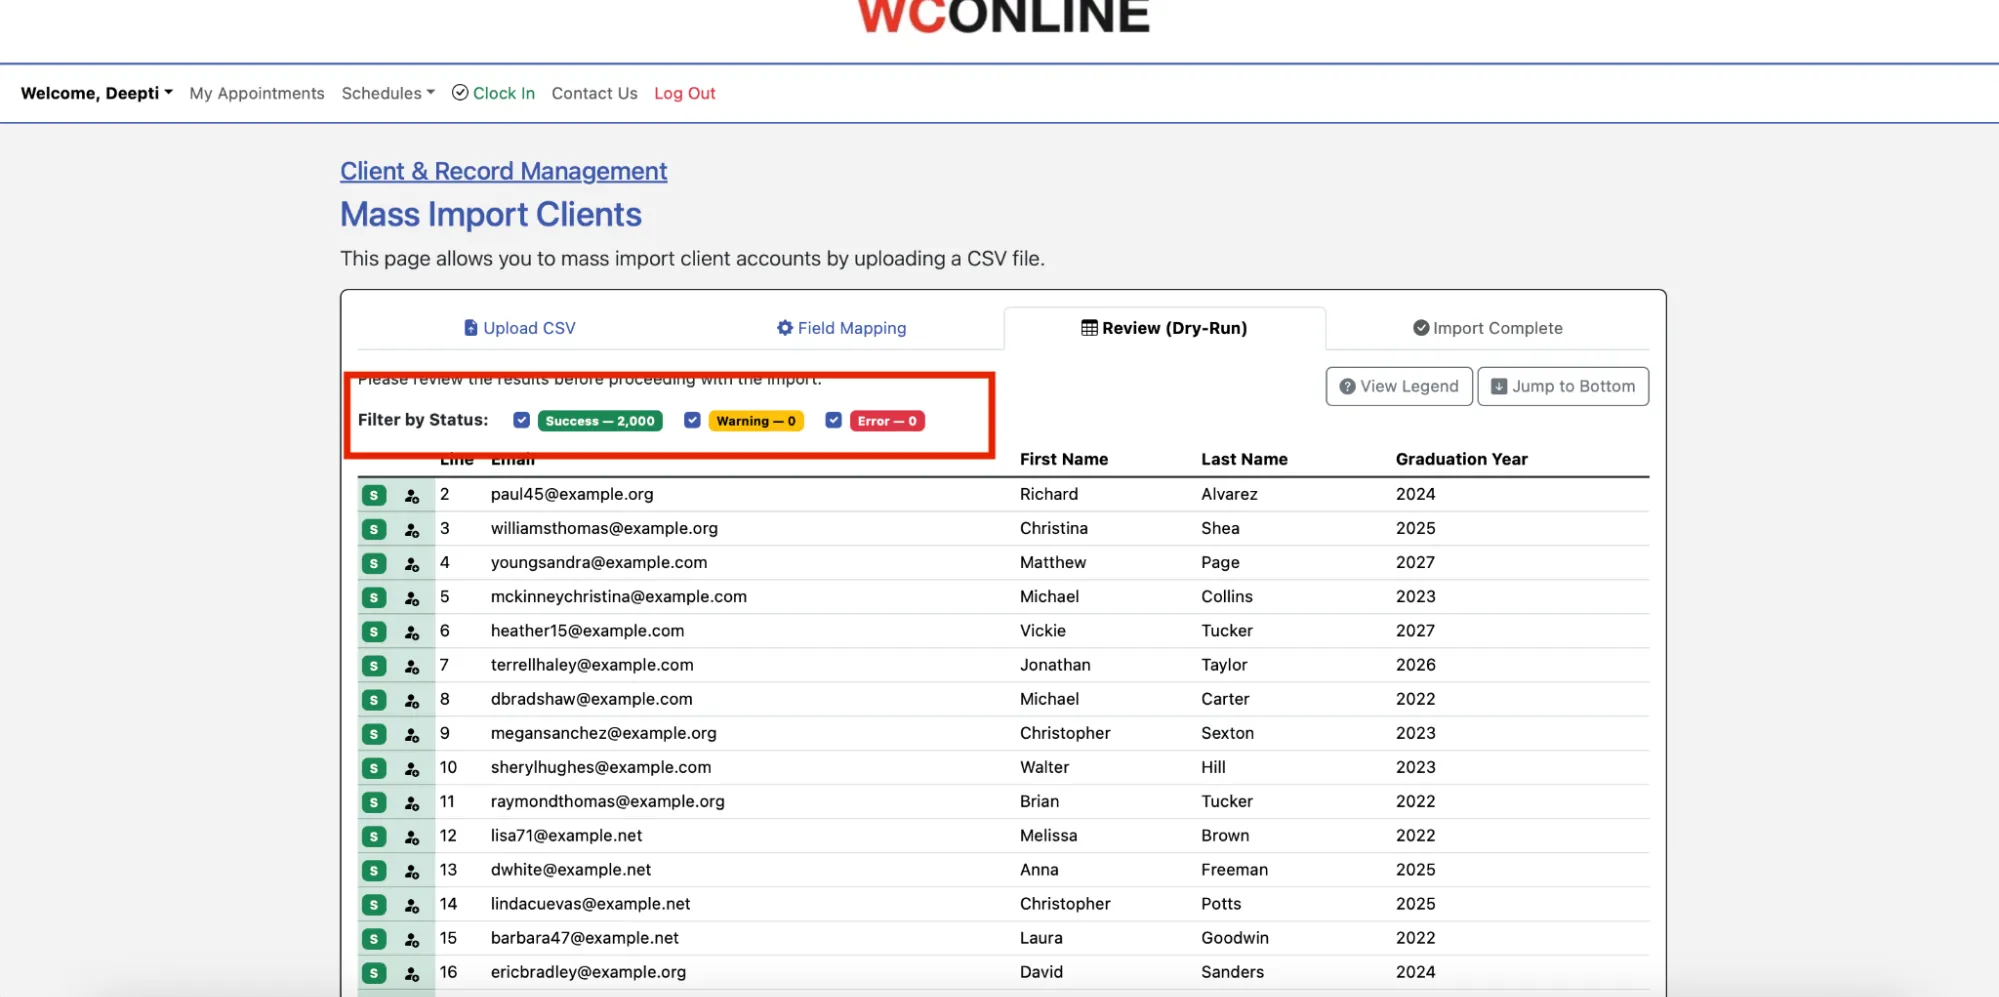
Section titled “Reviewing the Dry-Run”After you select Save Field Mapping at the bottom of the page, the tool shows a Review (Dry-Run) — a preview of exactly what the import will do. Check it for any warnings or errors before continuing:
- A warning means a value in your CSV doesn’t match any answer in a registration-form drop-down. For example, if your CSV lists a major of “Physical Therapy” but that isn’t one of the choices in your registration form’s majors question, the system can’t map it. To resolve it, either add the missing option to the registration question or change the CSV value to match an existing one. When editing a registration-form question, review the cautions for updating forms first.
- An error usually means a row has an invalid or missing email address or name — something that prevents that individual from being imported. The system can’t create or update that client until it’s corrected.
If you need help resolving warnings or errors, contact support@26llc.com.
Running the Import
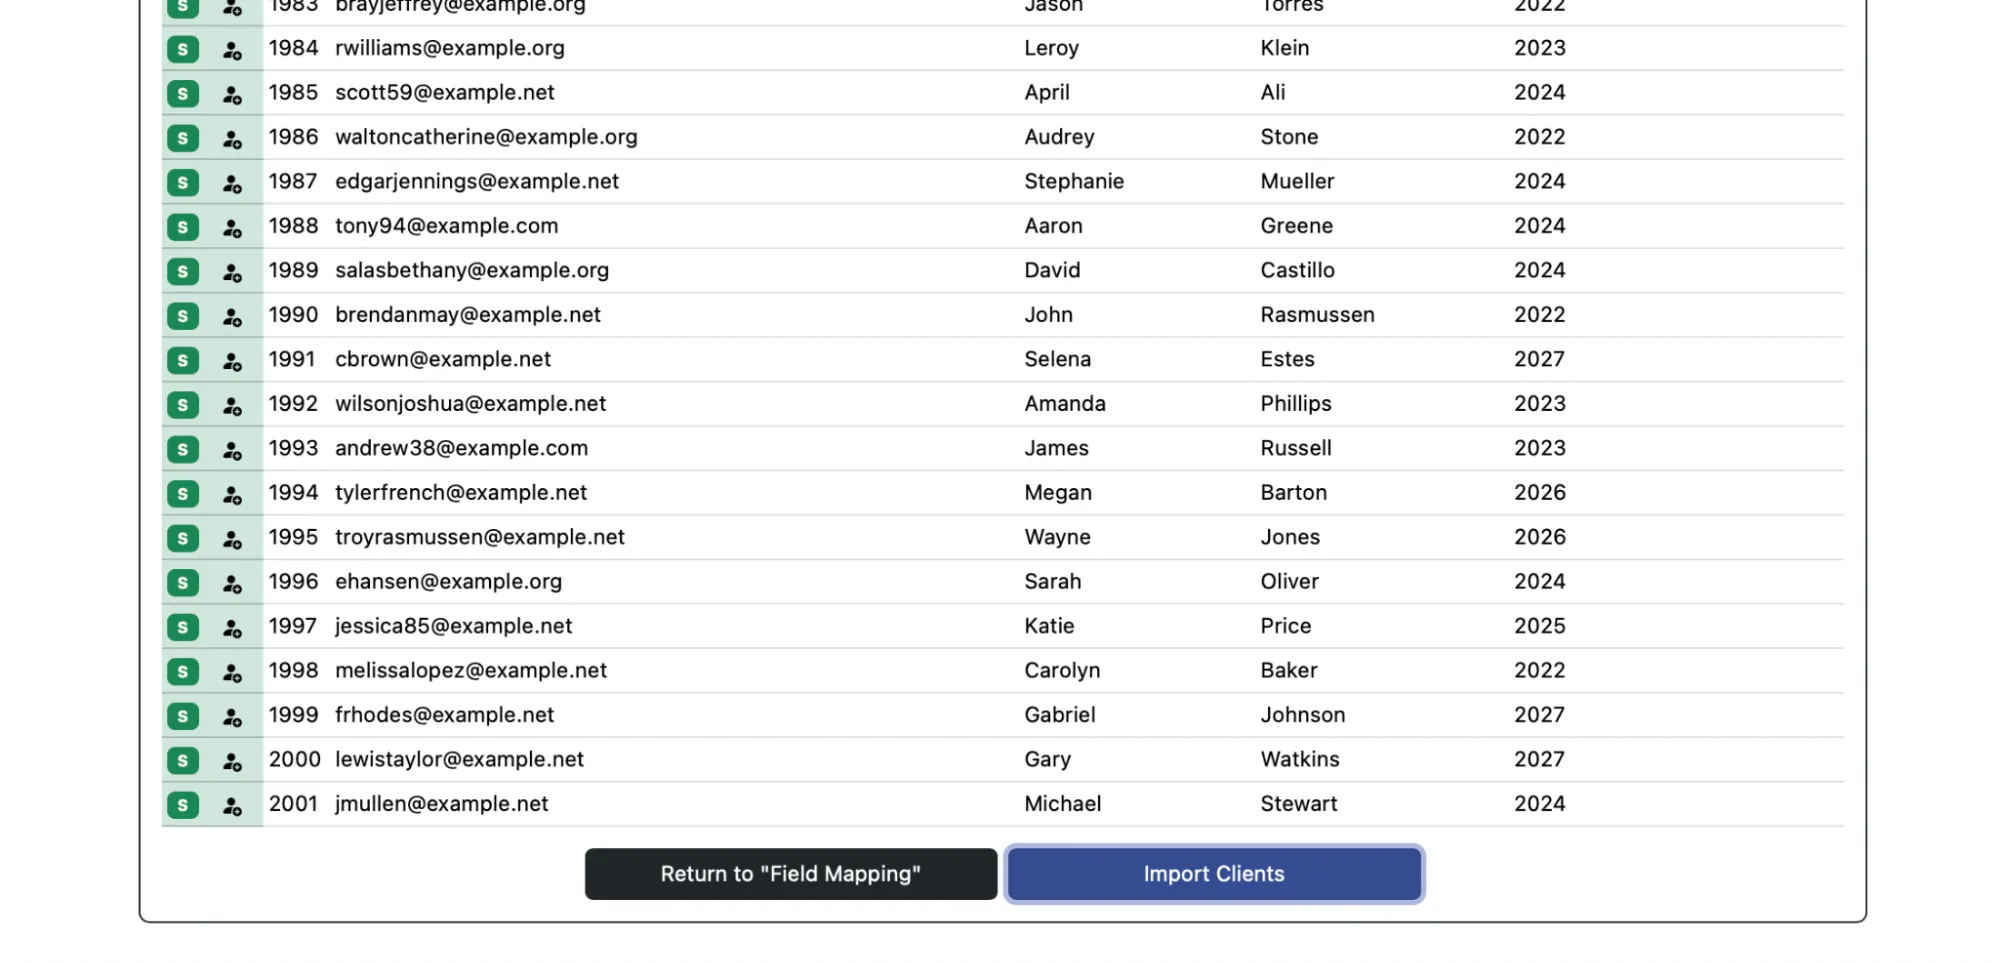
Section titled “Running the Import”Once the dry-run looks correct, use the Jump to the Bottom button (or scroll down) and select Import Clients to complete the import.
When it finishes, the system reports how many client accounts were created and how many were updated. You can return to Client & Record Management to see the new and updated clients in the list.
Updating Existing Client Data
Section titled “Updating Existing Client Data”If a row’s email address matches an existing client account, the import updates that account instead of creating a new one, using any non-empty values in the CSV. Empty cells leave the existing values in place, so you can include only the columns you want to change — for example, updating everyone’s class year at the start of a term.
What Clients See on First Login
Section titled “What Clients See on First Login”The first time an imported client logs in, they see the registration form with all imported fields pre-filled. They can answer any questions that weren’t part of the import (for example, “How did you hear about us?”), and once they save, they’re taken straight to the schedule. They won’t see the registration form again on later logins.