Survey Setup and Use
In Module Setup: Survey (which you’ll find under the “System Configuration” section of the Welcome menu), you’ll find a variety of options for setting up your post-session survey. Within WCONLINE, the post-session survey is truly anonymous and is typically used to solicit feedback from clients after they meet with a member of your staff. Hover over the question mark icons within the control panel for more information about each configuration option.
Once you’ve configured your survey, it will be available at https://[your WCONLINE url]/survey.php. You can also view the survey as a logged in administrator by using the link under the “Area Tools” option at the top of the control panel.
Keep in mind that you only have one survey available within a given WCONLINE subscription. For centers sharing a subscription, consider prefacing questions with things like, “If this was a Math Lab appointment…” in order to collect center-specific post-session data. Finally, because the survey is available without logging in to WCONLINE, it requires the completion of a CAPTCHA to ensure that a human (and not an automated spam bot) is completing the form. The CAPTCHA is removed if Enable Survey is set to Yes. Administrators Only. (as described below).
Configuration Options
Section titled “Configuration Options”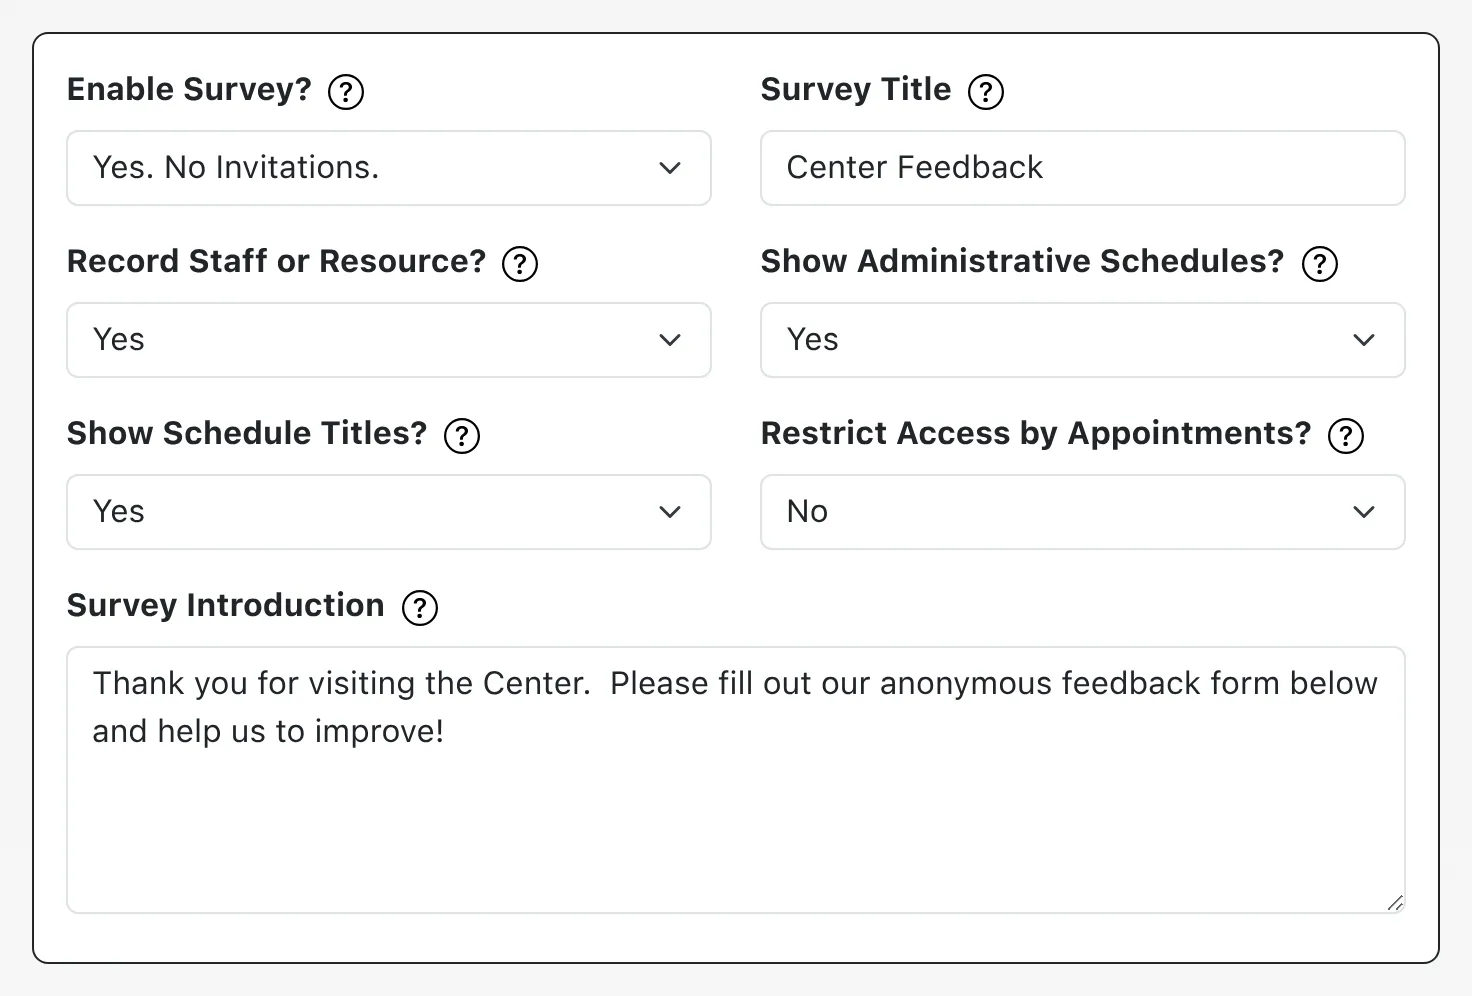
Enable Survey: There are several available methods for inviting clients to complete the survey:
- No: The system will prevent anyone (except logged in administrators) from accessing the survey. In effect, this is the “off” setting for the survey.
- Yes. Invite on Client Report Entry: If this option is selected, the system will send the client an email requesting that they complete the online survey once a staff member has completed the post-session client report form for a given appointment.
- Yes. Invite Automatically: If this option is selected, the system will send a client an email requesting that they complete the online survey automatically after the appointment has ended (as long as the appointment wasn’t canceled or marked missed). This setting allows for clients to be invited to take the survey regardless of whether a staff member enters a client report form.
- Yes. No Invitations. This option activates the survey so that it can be accessed and used; however, clients will have to be directed to the survey as they will not receive any automatic email requesting that they complete it. Typically, this setting is used when a center wants to invite clients to complete the survey once a semester, for example, by sending the survey link in a mass email (using the Mass Email Tool). Centers also use this option if they have a dedicated computer at their center that clients go to after a session in order to complete the survey.
- Yes. Administrators Only: If this option is selected, only logged-in administrators can access and complete the survey. This option is typically used by centers that ask administrators to enter information clients provide on paper-based surveys.
Survey Title and Survey Introduction allow you to define the title of your survey and the text information and instructions displayed below the title on the survey itself. Clients see this information when completing the survey on their devices.
Record Staff or Resource: Since surveys are anonymous, they are not connected to a client or appointment. Therefore, if you want to collect the name of the staff or resource with whom a client worked (and if you want to be able to see survey statistics sorted by staff or resource), you’ll need to select one of the ‘yes’ options for this configuration option.
- No: If this option is set to “no,” then clients will not be automatically asked to select the staff or resource with whom they worked.
- Yes: If this option is selected, WCONLINE will allow clients to select the name of the staff or resource with whom they worked (or an “I don’t know” option) from a list of staff or resources when completing the survey. That list is made up of all staff and resources who are attached to active schedules. Staff and resources attached to hidden schedules (as set in Schedule Management) not appearing in that list.
- Yes: Required: If this option is selected, clients will be forced to select the name of the staff or resource with whom they worked. This is the same as the previous option except that the selection is required, and there is no “I don’t know” option. If you set the Enable Survey option to Yes. Invite on Client Report Entry or Yes. Invite Automatically then clients will have the resource name selected automatically for them when they access the survey via link in the emailed invitation.
Show Administrative Schedules: If you use one of the “Yes” options under Record Staff or Resource, the drop-down menu presented to clients on the survey lists all staff and resources on available—not hidden or archived—schedules, as set in Schedule Management.
- Yes: With the default “Yes,” clients can choose from a list of staff and resources on all active schedules. This means, even if an administrator makes an appointment for a client on an administrators-only schedule, the client can still select their staff or resource on the survey.
- No: If you would prefer that clients not see the names of staff and resources on administrators-only schedules, choose “No,” which sets the drop-down menu to display only staff and resources on schedules that are set as “Available to Everyone” in Schedule Management.
Show Schedule Titles: If you use one of the “Yes” options under Record Staff or Resource, the drop-down menu of staff and resources on the survey lists staff and resources’ names with schedule names, such as “Alex (Writing Center Fall 2024).”
- Yes: With the default “Yes,” staff and resources’ names are listed with schedule names, as in the example above.
- No: If you would prefer to see only staff and resources’ names, choose “No.” This would make the above list show only, “Alex” in the example above. This likely useful if most names do not repeat and if schedule names are long and not helpful in finding a given staff or resource in the list.
Restrict Access by Appointments: Since the survey is anonymous and available without a login, anyone can access the survey, which means anyone is allowed to submit a survey, provided they complete the CAPTCHA requirement.
If you set the Enable Survey option to Yes. Invite on Client Report Entry or Yes. Invite Automatically, and if you would like to allow only clients who have received the email to access your survey, choose Yes. Once set, your survey email will include a link that the client has to click to reach your survey. The link includes a one-time-use token that is not saved or connected to any appointment or client (so that the survey is still anonymous) and that allows the client to open the survey. Anyone else trying to reach your survey would be taken to the login page. Using Yes also means that your survey no longer needs its CAPTCHA, since it is not available other than through the emailed link.
Survey Invitation Email
Section titled “Survey Invitation Email”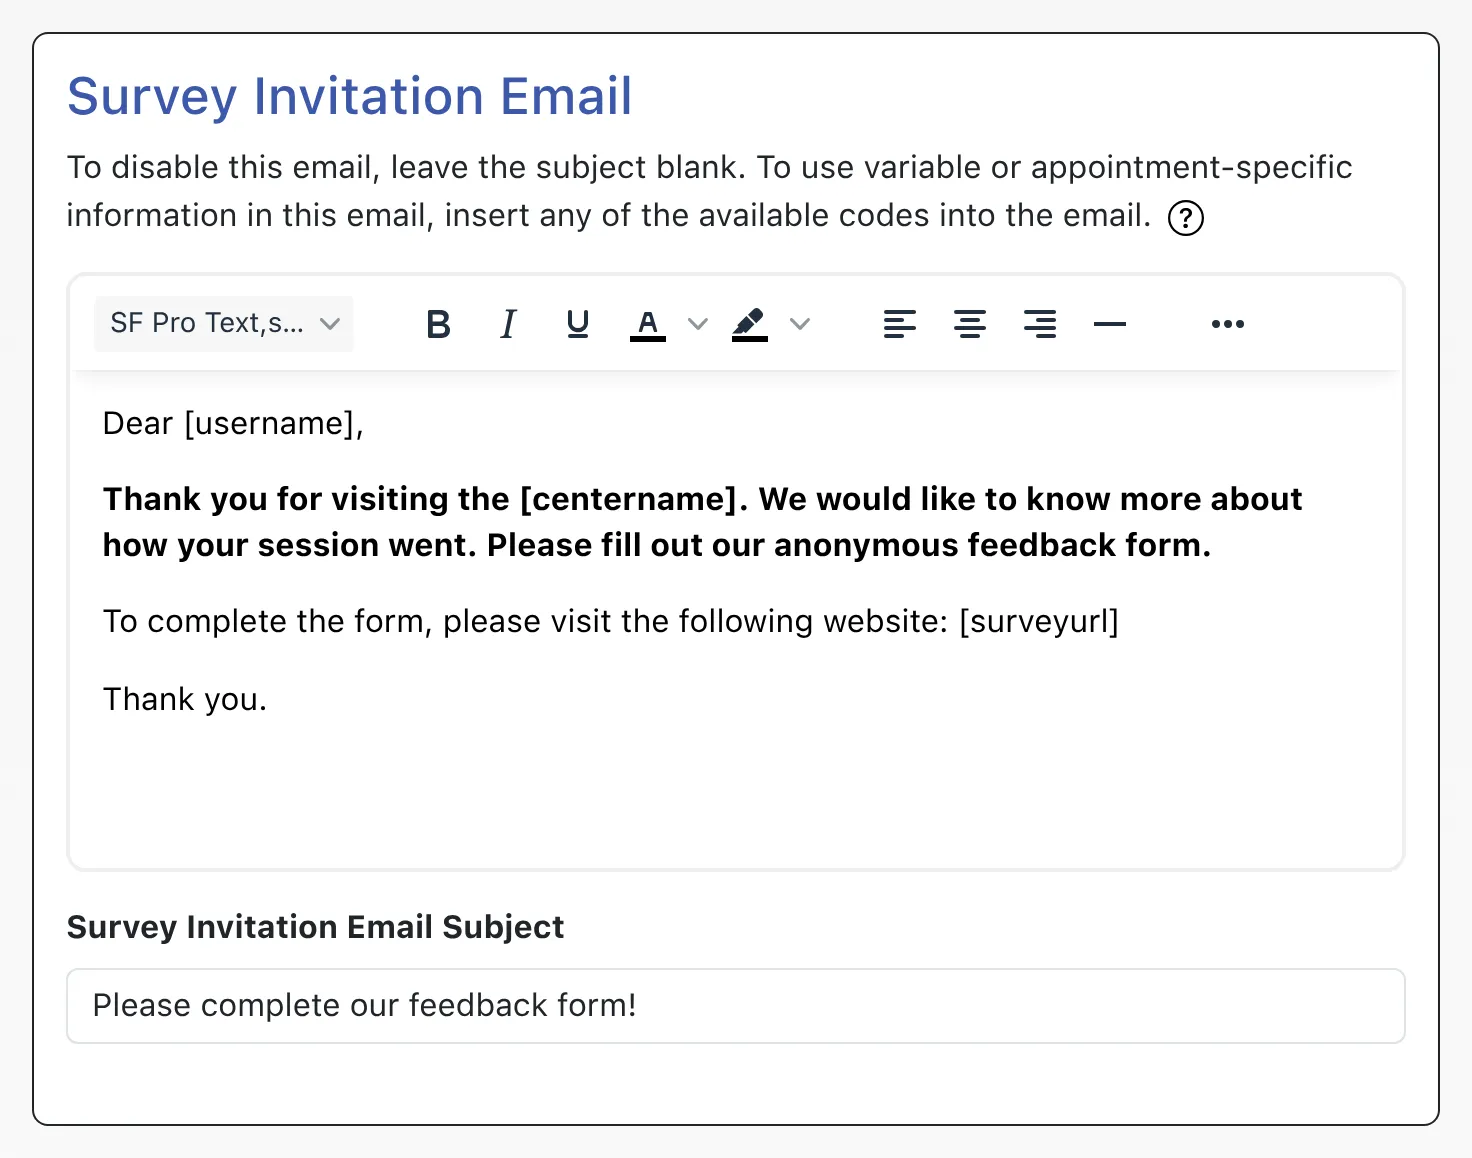
Survey Invitation Email and Survey Invitation Email Subject allow you to define the body and subject line of the email that is sent to clients requesting that they complete the survey (if you select one of the automated emails in the “Enable Survey” option above).
Like most emails within WCONLINE, the system provides several “Available Codes” that you can use within the subject and body of the email. Those codes, available by hovering over the question mark icon in this area, are replaced with non-static information. For example, if you enter [firstname], that code is replaced with the client’s first name when the email is set.
When composing the survey email, be sure to either use the [surveyurl] code or manually type the URL for your survey; otherwise, clients won’t know how to access the survey when they receive the email (as you will see noted in WCONLINE if you exclude the “[surveyurl]” code).
Survey Questions
Section titled “Survey Questions”With the exception of the Record Staff or Resource question (as defined above), you have full control over the questions asked on the survey. Like most other forms, you are limited to a total of twenty questions. Those questions are also configured in the same way as other forms within WCONLINE.
To edit an existing question, make changes to the question as it appears within Module Setup: Survey. To add a new question to the form (up to the twenty question limit), use the New Question section located at the bottom of Module Setup: Survey.

Question: This field lets you define the question as asked on the survey form.
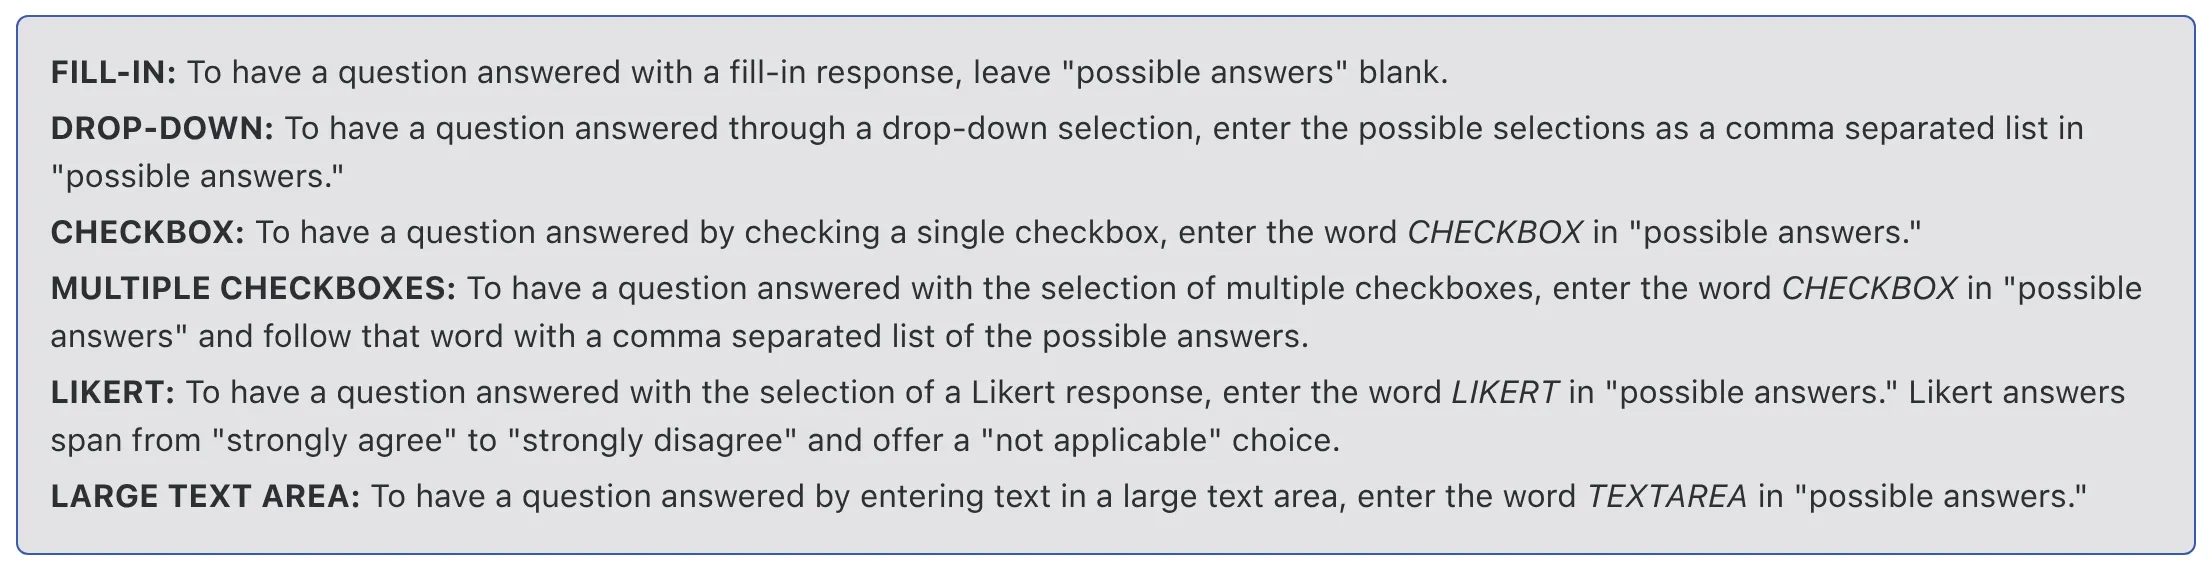
Possible Answers: This field lets you define the type of answers or the available answer choices available to answer the corresponding question on the survey form. Be sure to review the “Possible Answer Types” informational box above the question configuration options for extensive information about the various answer types. The survey form offers fill-in, drop-down, checkbox, multiple checkbox, Likert, and large text area question and answer types.

Order on Form Arrow Icons: These icons let you change where questions appear on your survey form. Once clients have begun completing surveys on your system, you’ll want to use the these icons to change the question order, as your data is tied to the specific question (Question #1, #2, etc). For more on why this is important, review our recommendations on making changes to your forms. To move a question up on the form, select the “up” arrow. To move a question down, select the “down” arrow.
Required: This field lets you set whether or not a client has to complete the corresponding question in order to save their survey response.
Note that, in order to preserve the validity of survey data, individual survey responses cannot be removed. Contact us if you would like for all survey responses to be removed from your system (or if you have any additional questions about the survey).
Survey Data
Section titled “Survey Data”The System Statistics Report shows results from all your forms (including from your survey). Drop-down, checkbox, and Likert answers can be counted automatically and so are displayed in graphs with percentages in that report. Under each area in System Statistics, you can click “view answers” to see answers to fill-in and longer “textarea” answers—with numbers if any answers are the same as others. If you use the Record Staff or Resource option, then you will be able to limit survey results by staff or resource. In addition and like all data in WCONLINE, you can export your survey data into a spreadsheet using the “Survey Data” option in the System Data Export tool.