Using Profile & Communication Options
Profile & Communication Options allows you to update your own profile and configure a variety of communication options and account-level preferences. The control panel is available at the top of the Welcome menu and can be accessed by anyone who has an account on WCONLINE. Changes made within Profile & Communication Options affect the account of the person making the changes.
- If an administrator wants to create an account for a new client, they should not use this form. Rather, the administrator should either have the client register using the link on the login page or use the ADD NEW CLIENT tool in the “Area Tools” section of Client & Record Management and at the top of the Calendar and Standard displays.
- If an administrator wants to edit the registration profile of an existing client, they should not use this form. Rather, the administrator should search for the client’s profile and edit the client in Client & Record Management.
- If an administrator wants to change their email address, they should first list the new email address in “Administrative Access Management” (which is available within the “Area Tools” section of Staff & Resource Management). Once the new email address is listed there, the administrator can update their email address here and continue to be recognized as an administrator by WCONLINE.
This chapter also covers the REGISTER FOR A NEW ACCOUNT form that clients must first fill out in order to access WCONLINE (as that form mirrors the “update profile” form and functionality).
Registration Form Questions
Section titled “Registration Form Questions”The first section of Profile & Communication Options collects the client’s email address, first name, last name, and the answers to the questions that you define in Form Setup: Registration Form. (Note that you can change the phrasing used to describe first and last name via the “Language Options” tool within Global System Settings.)
When registering for a new account, none of the fields will be populated; however, when updating one’s own account, all of the fields will be populated with the information that the individual entered when last filling out the form. Anyone filling out or updating the form will have to complete all required fields and enter a valid email address (that is not associated with another account on the system). When ready to submit the form, the client will either select “save changes” or “complete registration” depending on whether the client is updating their existing profile or creating a new account. At that point, the system will either complete the process or display detailed errors about problems with the submission.
Password
Section titled “Password”Directly beneath the registration form questions is the password section of the form. When registering for a new account, clients will need to enter a password twice before being able to complete the registration process. When updating their profile, clients will only enter a password twice should they wish to change their password. Passwords must be at least ten characters long. Additional password requirements can be set via the Password Requirements setting in Global System Settings.
Settings in other areas of WCONLINE can impact the display of both the registration form questions and password entry fields:
- If LDAP/S has been configured and activated in the “Authentication Options” section of Global System Settings, then the forms won’t allow clients or administrators to change or enter their email address and password (since that information is provided by your institution).
- If Universal SSO has been configured and activated in the “Authentication Options” section of Global System Settings, then the forms won’t allow clients to change or enter their email address and password (since that information is provided by your institution). Administrators updating their existing profile will have the option to update their email and password, though, since they log in to WCONLINE directly.
- If Force Profile Update in Global System Settings is set to a date and if a given client hasn’t updated their profile since that date, then the client will see a message at the top of the update profile form telling them that they have to make a change or save their profile to continue using WCONLINE.
- If Registration Domain Limit in Global System Settings lists one or more email domains, the registration displays the “at” symbol and domain(s) under “Email Address,” and the forms allow registration only with one of the allowed domains.
Communication & System Preferences
Section titled “Communication & System Preferences”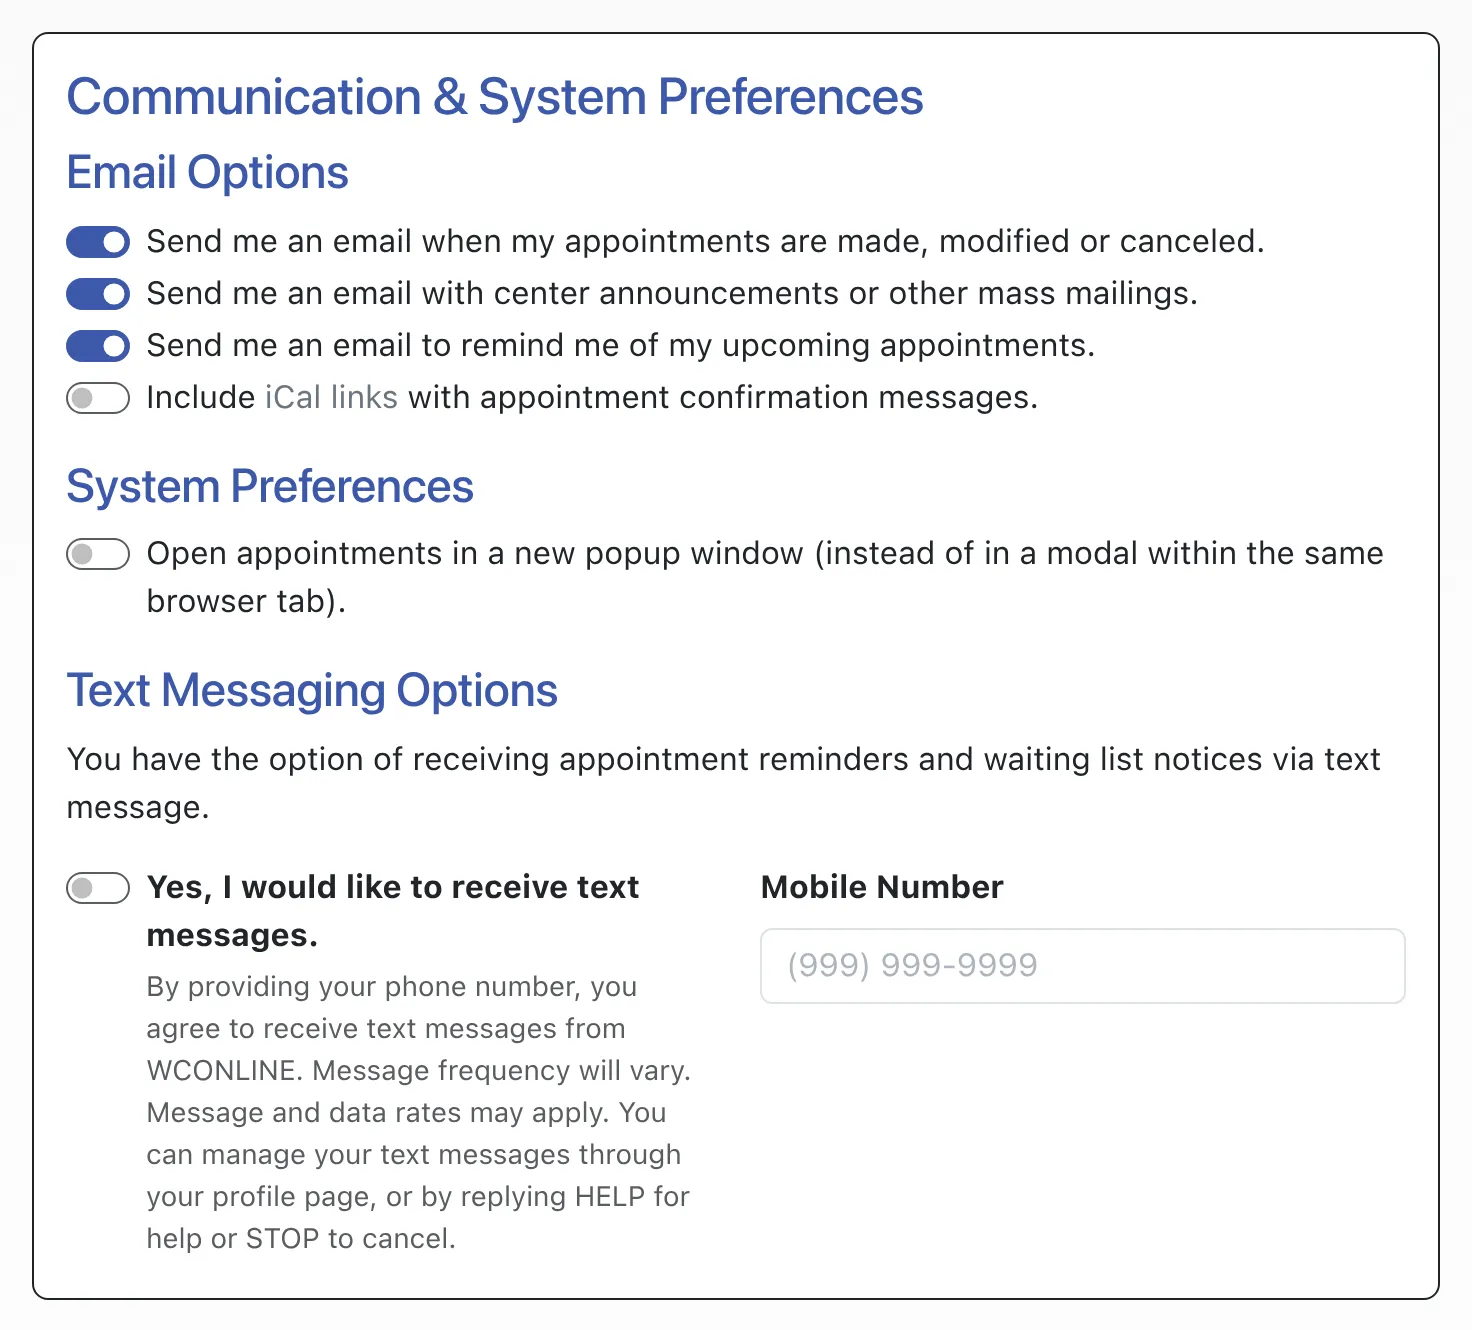
“Communication & System Preferences,” which is available directly below the password entry area of the form, allows a client to opt in to a variety of emails sent through the system and to manage other system-wide preferences. While administrators can opt a student out of receiving mass emails (by editing the client’s profile in Client & Record Management), administrators cannot opt a client into receiving any type of communication from WCONLINE. All options default to sending the email to the client.
Email Options
Section titled “Email Options”Send me an email when my appointments are made, modified or canceled: This determines whether or not a client will receive the appointment confirmation emails (as set in Schedule Management) when an appointment lists them as the client (or individual receiving service) and is made, modified, or canceled.
Send me an email with center announcements or other mass mailings: This determines whether or not a client will receive emails sent through the Mass Email Tool.
Send me an email to remind me of my upcoming appointments: This determines whether or not a client will receive the reminder email (as set in Schedule Management) before their scheduled appointments.
“Email preferences” also offers clients an additional option: Include iCal Links with Appointment Confirmation Messages. If a client uses a calendar program that supports iCal (such as Microsoft Outlook, Google Calendar, or Mac Calendar), setting this option to YES allows the system to include iCal information with the appointment confirmation emails. iCal attachments use the Institution’s Time Zone from Global System Settings so that the appointment shows in the correct local time, and they allow the client to add the appointment to their offline calendar with a single click within the email message.
System Preferences
Section titled “System Preferences”Open Appointments in a New Popup Window: By default, the appointment form opens as an embedded modal within the webpage currently viewed. This option allows the client to have the appointment form open in a separate popup window if they prefer.
Default to the schedule calendar view instead of the standard “appointment search” display: This option allows an individual to choose whether they would like to be taken to the Calendar Display or the Standard Display when logging in. Note that the availability and initial default of this option is is impacted by the Global Display Preferences setting in the “Registration-Specific Settings” section of Global System Settings.
Text Messaging Preferences
Section titled “Text Messaging Preferences”If Use Mobile Text Messaging in Global System Settings is set to YES, then this section will also offer a “Text Messaging Preferences” section that allows clients to opt-in to receiving text messages from the system. If a client opts-in, they will receive appointment reminders and waiting list notifications (as configured in Schedule Management) via text instead of via email. Administrators can additionally opt in to use two factor authentication when logging in to the system.
While administrators cannot see the mobile phone information that clients have attached to their account, administrators can remove mobile phone information from a client’s account via the mobile phone icon next to a client’s name or the REMOVE MOBILE option in the “Area Tools” section of Client & Record Management. Clients can always opt back out of receiving texts simply by removing their mobile phone information from this section. Clients can also remove their number by using the “receiving unwanted texts” option at the bottom of the login form.
Mobile Number: This is the client’s ten-digit mobile phone number.
Mobile Carrier: This is the mobile phone carrier or provider or company that the client uses for their mobile phone service. The drop-down list first lists common US carriers, then common Canadian carriers, and then other carriers.
Because of how WCONLINE sends text messages, only those carriers that support email-to-text will work with the program. We do update the list of available carriers frequently, but cannot add carriers that aren’t currently listed. Once a carrier begins supporting email-to-text and once we test the connection, that carrier will be added automatically to the list of available carriers. If a client has a carrier that isn’t listed, then the client shouldn’t opt-in to text messaging and instead should continue to receive reminders and waiting list notifications via email.
Once a client has saved their number and carrier, the system will offer an option to Send Test Text Message. If selected, WCONLINE will immediately send the client a test text. If the client receives the text, then they’ll know their settings work with their device. If not, they can try different settings or remove their settings in order to opt back out.
Finally, once an administrator has opted-in to text messaging, they can also Enable Two-Factor Authentication. Once enabled, administrators will receive a text message with a code immediately after logging in to WCONLINE. They will have to enter that code into WCONLINE in order to continue the log-in process and access the system.
European Union GDPR Statement
Section titled “European Union GDPR Statement”If Add GDPR to Registration in Global System Settings is set to YES, then clients will be presented with a GDPR statement when registering for a new account or updating their existing profile. That statement requires that clients check a box signifying their understanding of the GDPR data restrictions and processes.
GDPR compliance requires specific concessions and agreements by the center using WCONLINE. As such, be sure to review the information in the blue question mark next to the option in Global System Settings as well as the manual entry on the option before adding this option to your registration process.
If you add information under Registration Form Additions in Global System Settings, that information shows up at the top of the registration and profile-update forms.