Using the Mass Email Tool
Once you open the Mass Email Tool (which you’ll find under the “System Utilities & Reports” section of the Welcome menu), you’ll find a variety of options for defining what clients should receive the mass email. Below those configuration options, you’ll find a form that allows you to compose the email itself using an on-screen what-you-see-is-what-you-get editor.
Emails sent through the Mass Email Tool always provide opt-out instructions to clients and are logged. The log is available by selecting “View Mass Email Log” within the “Area Tools” menu at the top of the Mass Email Tool.
Configuration Options
Section titled “Configuration Options”At the top of the Mass Email Tool, you’ll find several options for defining the group of clients who will receive your email.
Clients can opt-out of (or in to) receiving mass emails by editing their profile via the Profile & Communications Options link in their Welcome menu. Administrators can opt clients out of receiving mass emails by editing the client’s profile in Client & Record Management and changing the Mass Email Opt-Out option to “Do not send mass emails to this client.” Administrators cannot opt a client into receiving such emails. Note, too, that clients whose accounts have been manually deactivated either by editing the account’s profile in Client & Record Management to set the Deactivate Account option to “Yes” or via the “Mass Deactivate Accounts” tool within the “Area Tools” menu of Client & Record Management will also not receive mass emails.
Mass emails are only delivered to active clients. Specifically, WCONLINE will only send mass emails to clients who have logged in within the past three years, or to users who have recently registered or updated their profile (within the past year). Clients outside of these windows are silently skipped, even if they otherwise match the Send the message to selection and registration question filters described below.
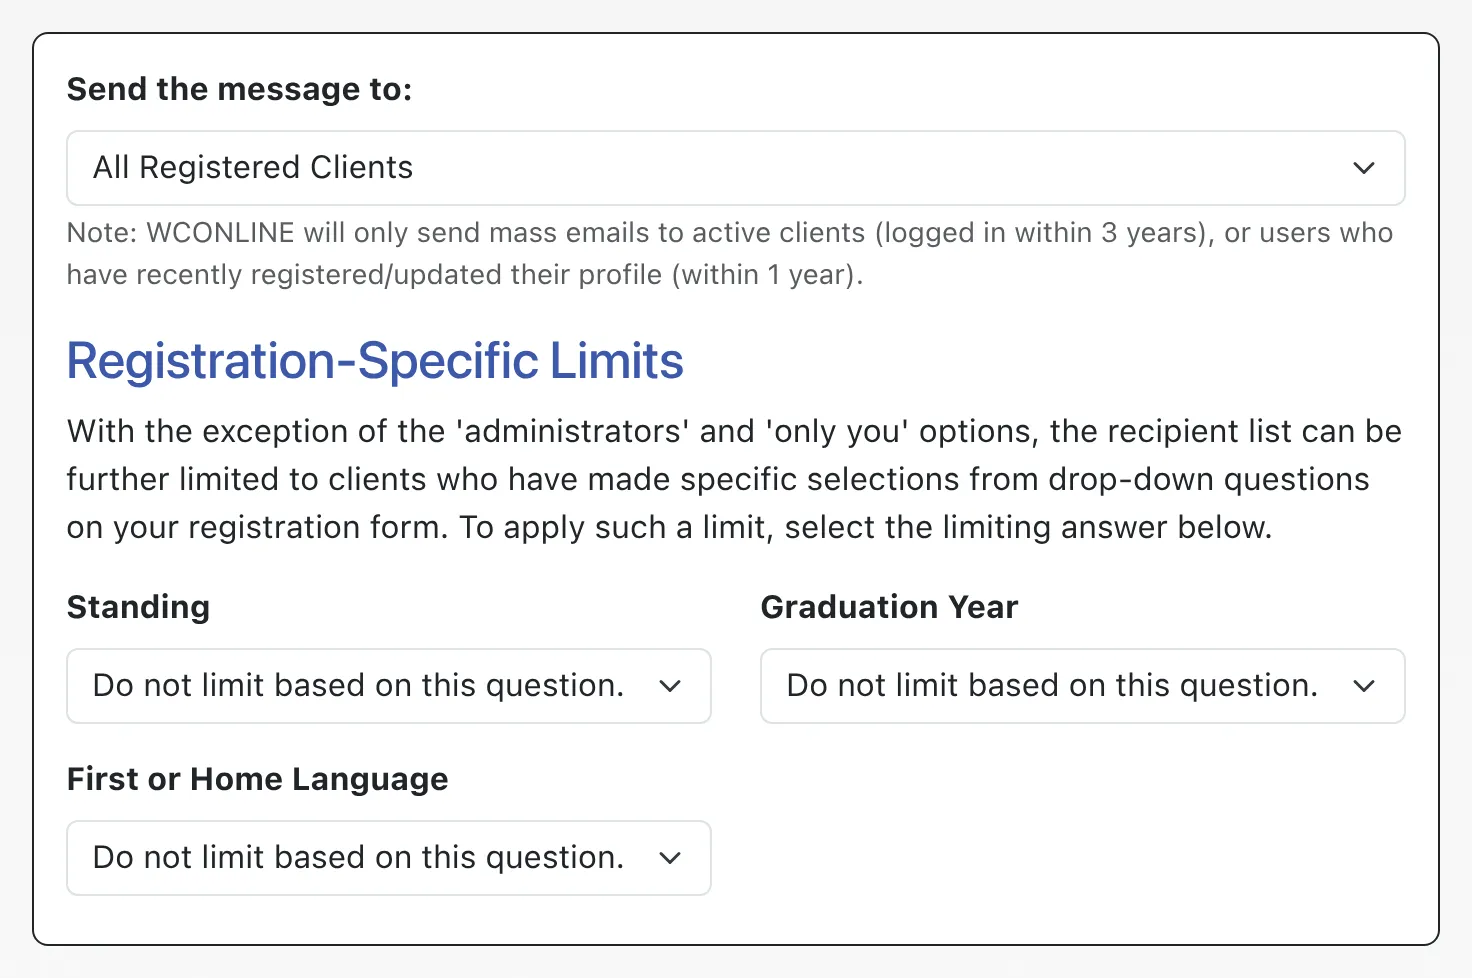
Send the message to: This option lets you define who will receive the email. Specifically, you can send the email to:
- ALL REGISTERED CLIENTS: This will send the message to every client who has registered for an account on your system and who is listed in Client & Record Management.
- ALL BASIC AND FULL ADMINISTRATORS: This will send the message to every full and basic administrator on your system. You can see (and manage) administrators by choosing “Administrative Access Management” from the “Area Tools” menu of Staff & Resource Management.
- ONLY YOU (AT [EMAIL]): This will send the message just to your email address (as displayed within the option). This is useful if you want to test how an email will look once received within your email program.
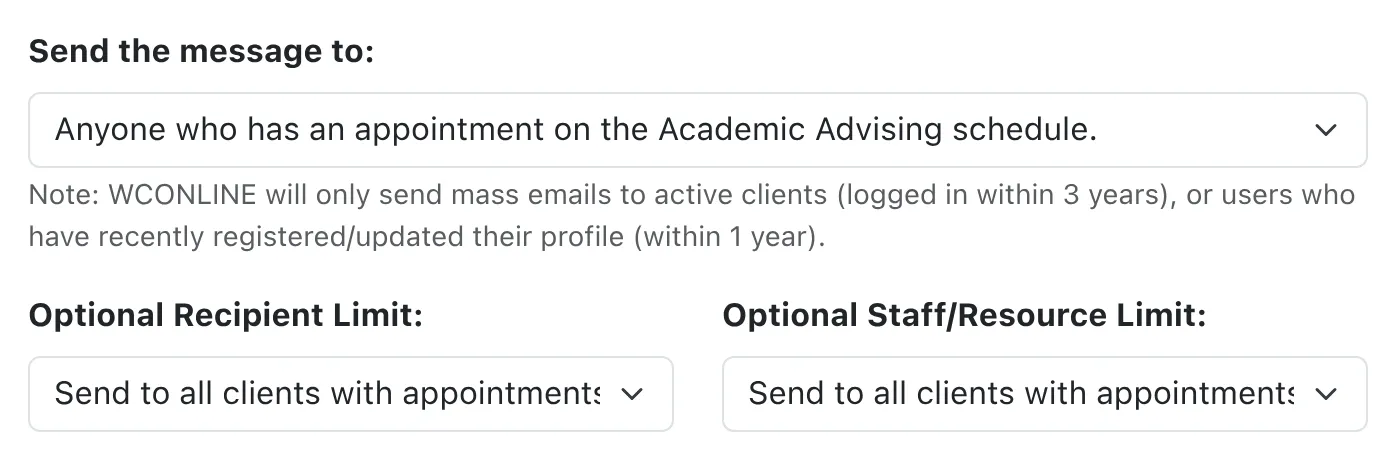
- ANYONE WHO HAS SCHEDULED AN APPOINTMENT ON THE [SCHEDULE NAME] SCHEDULE: This will send the message to every client who has an appointment (in the future, for the current day, or in the past) on the selected schedule.
If you select a specific schedule from the Send the message to menu, WCONLINE will present a new menu that enables you to further define the recipient list.
-
Optional Recipient Limit: This menu allows you to send the message to a subset of those with appointments on the selected schedule:
- SEND TO ALL CLIENTS: This option will send the email to everyone who has an appointment on the schedule regardless of whether or not that appointment is in the past or future.
- ONLY CLIENTS WITH AN APPOINTMENT TODAY OR IN THE FUTURE: This option will not send the email to clients whose appointments took place before today.
- ONLY CLIENTS WITH AN APPOINTMENT TODAY: This option will only send the email to clients who have an appointment on the current day.
- ONLY CLIENTS WITH AN APPOINTMENT YESTERDAY: This option will only send the email to clients who have an appointment on the previous calendar day.
- ONLY CLIENTS WITH AN APPOINTMENT TOMORROW: This option will only send the email to clients who have an appointment on the next calendar day.
- ONLY CLIENTS ON TODAY’S WAITING LIST: This will send the message to every client who has joined the waiting list for the current day on the selected schedule (as enabled via the Use the Waiting List option in Schedule Management).
-
Optional Staff/Resource Limit: This menu lets you only send the message to all clients or to just those clients who have an appointment with a specific staff or resource.
With the exception of the ‘administrators’ and ‘only you’ options, the recipient list can be further limited to clients who have made specific selections from drop-down questions on your registration form (as set in Form Setup: Registration Form). For example, if you ask clients their “Standing” on the Registration Form, and have that question set to be answered via a drop-down that provides the choices of “Freshman” and “Sophomore,” then the Mass Email Tool will display Standing with the options:
- DO NOT LIMIT BASED ON THIS QUESTION: This will send the message to every client as defined by the Send the message to: choice.
- ONLY SEND TO: FRESHMAN: This will send the message to all clients who have answered your “Standing” registration form question with “Freshman” within the group of clients defined by the Send the message to: choice.
- ONLY SEND TO: SOPHOMORE: This will send the message to all clients who have answered your “Standing” registration form question with “Sophomore” within the group of clients defined by the Send the message to: choice.
Composing and Sending a Mass Email
Section titled “Composing and Sending a Mass Email”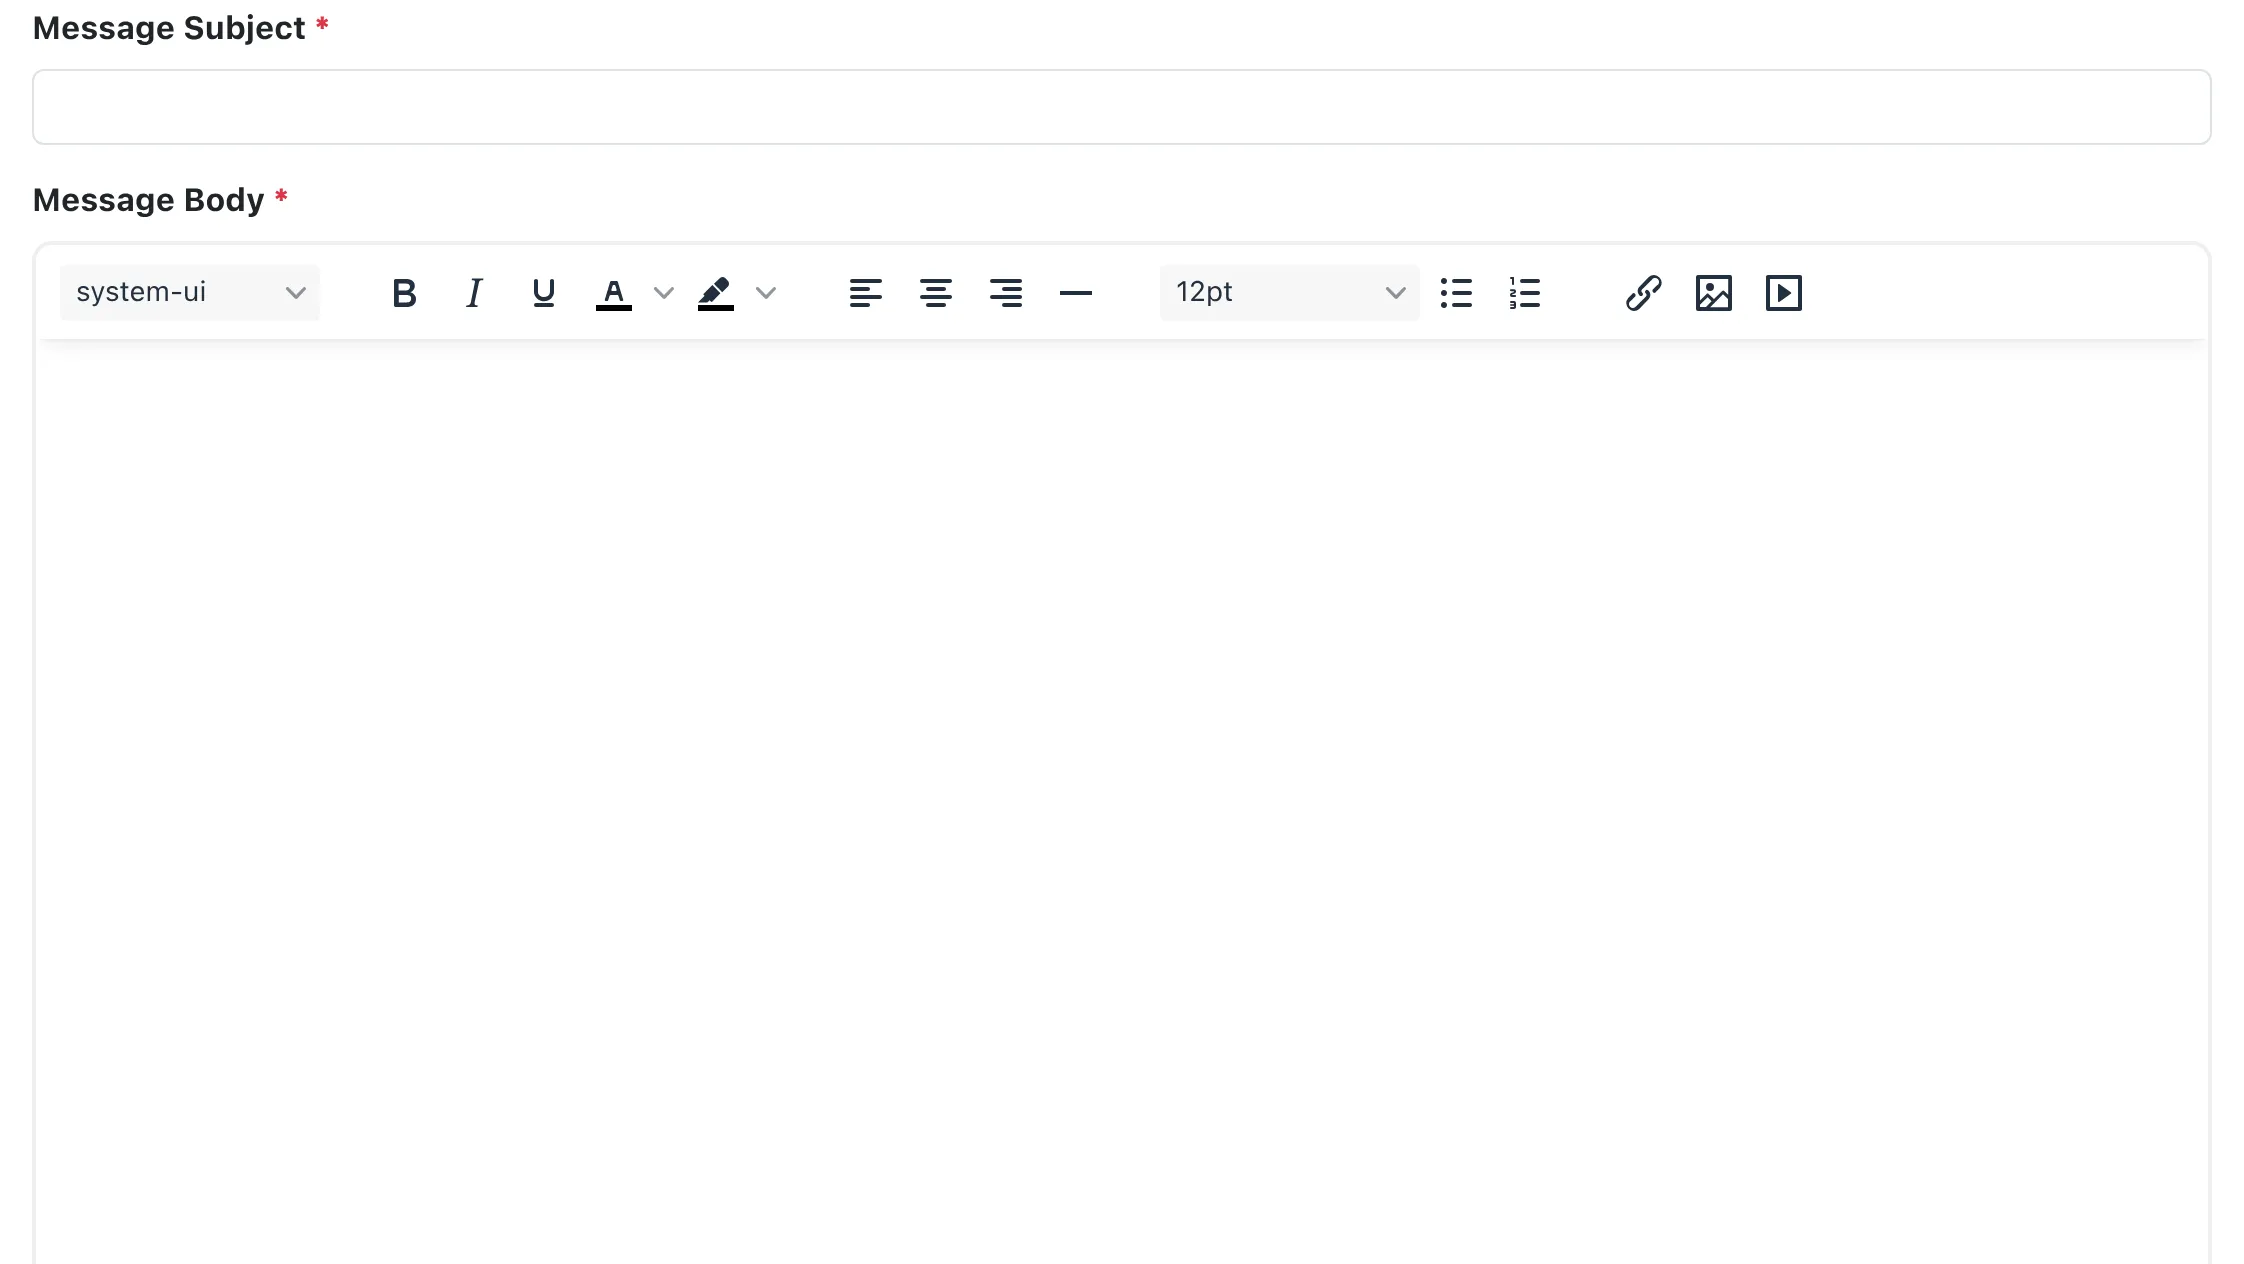
Once you’ve defined who will receive your mass email, you’ll use the options in the composing area to prepare and send the mass email and then will send the email by selecting the “Send Message” button. Depending on how many clients the message is being sent to, it may take a couple of minutes for the message to be sent and for the screen to refresh with a “success” message. Only select the “Send Message” button once. Messages are sent immediately but, depending on internet traffic, your email provider, and your own email program, may take from a few seconds to ten minutes to arrive in inboxes.
All emails sent through the Mass Email Tool will automatically include information about unsubscribing from future messages and will be copied to the Center/System Email as set in Global System Settings. WCONLINE automatically appends opt-out language similar to:
To opt out, log in to [YOUR SITE’S WCONLINE URL] and then select ‘Profile & Communication Options’ from the welcome menu.
Message Subject: This is the email subject as displayed in the outgoing email’s “subject” field.
Message Body: This is the body of the message. You can use the what-you-see-is-what-you-get editor to format your message (or you can compose the message in a word processor and then copy it into the editor, which will retain most formatting). The editor also allows you to include images in the outgoing messages. In order to help prevent messages from being caught by spam filters, we recommend including text that describes the purpose of the message (rather than only sending an image, for example).